Steve's GKD Legend

Steve's GKD Legend
Still, On the road again!

Search This Blog

Saturday, 17 January 2015

Onwards towards a nice upgraded M3 Clutch

Happily the ARP bolts arrived so I was able to get them in and torqued.
Fastener assembly lubrication on thread and under the head.
All ARP bolts torqued to 20 Nm plus 70 degrees.
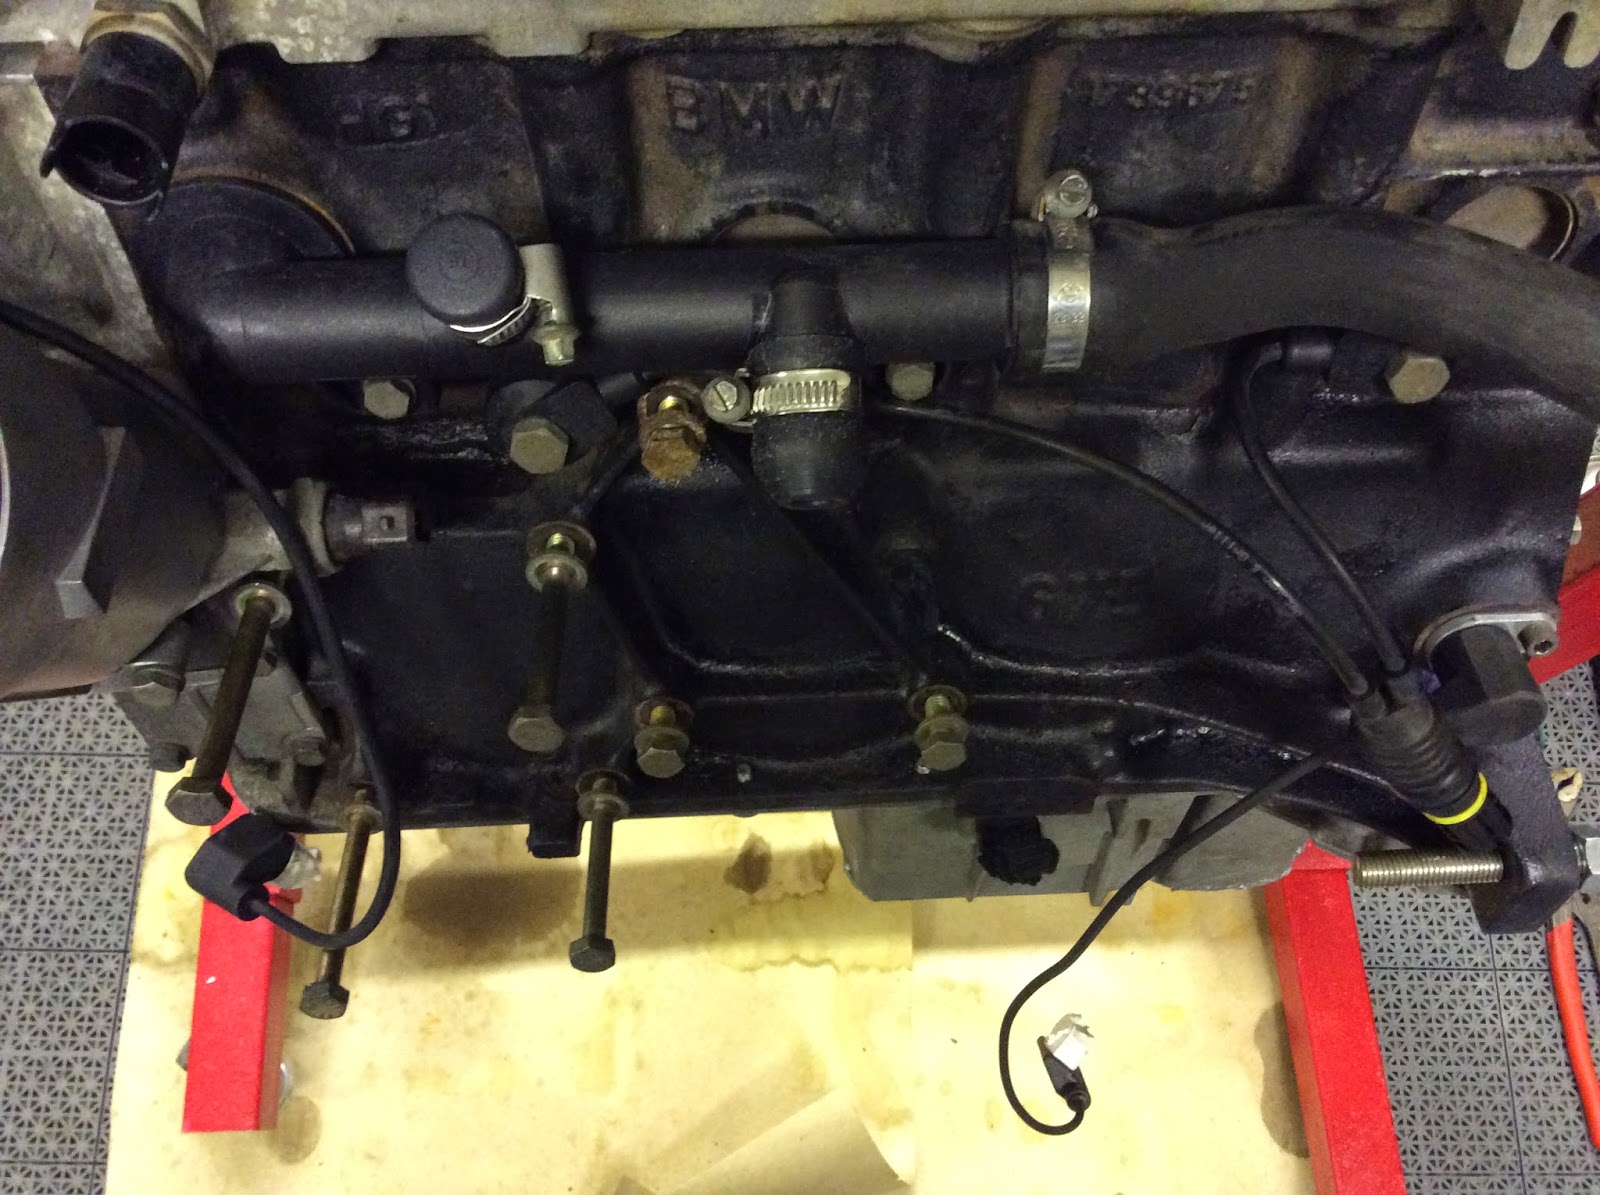
New sump gasket in place. 

Sump bolted and also torqued into place.

Time to get the clutch parts ready by cleaning out the bell housing and placing a little copper paste on the shaft and a small amount of grease on the splines.  
New throwout bearing and cleaned up clutch fork.
Checking the new M3 clutch plate fits nicely on the spline before getting it attached to the clutch housing. "Getriebe seite" on the clutch plate (Towards gearbox)
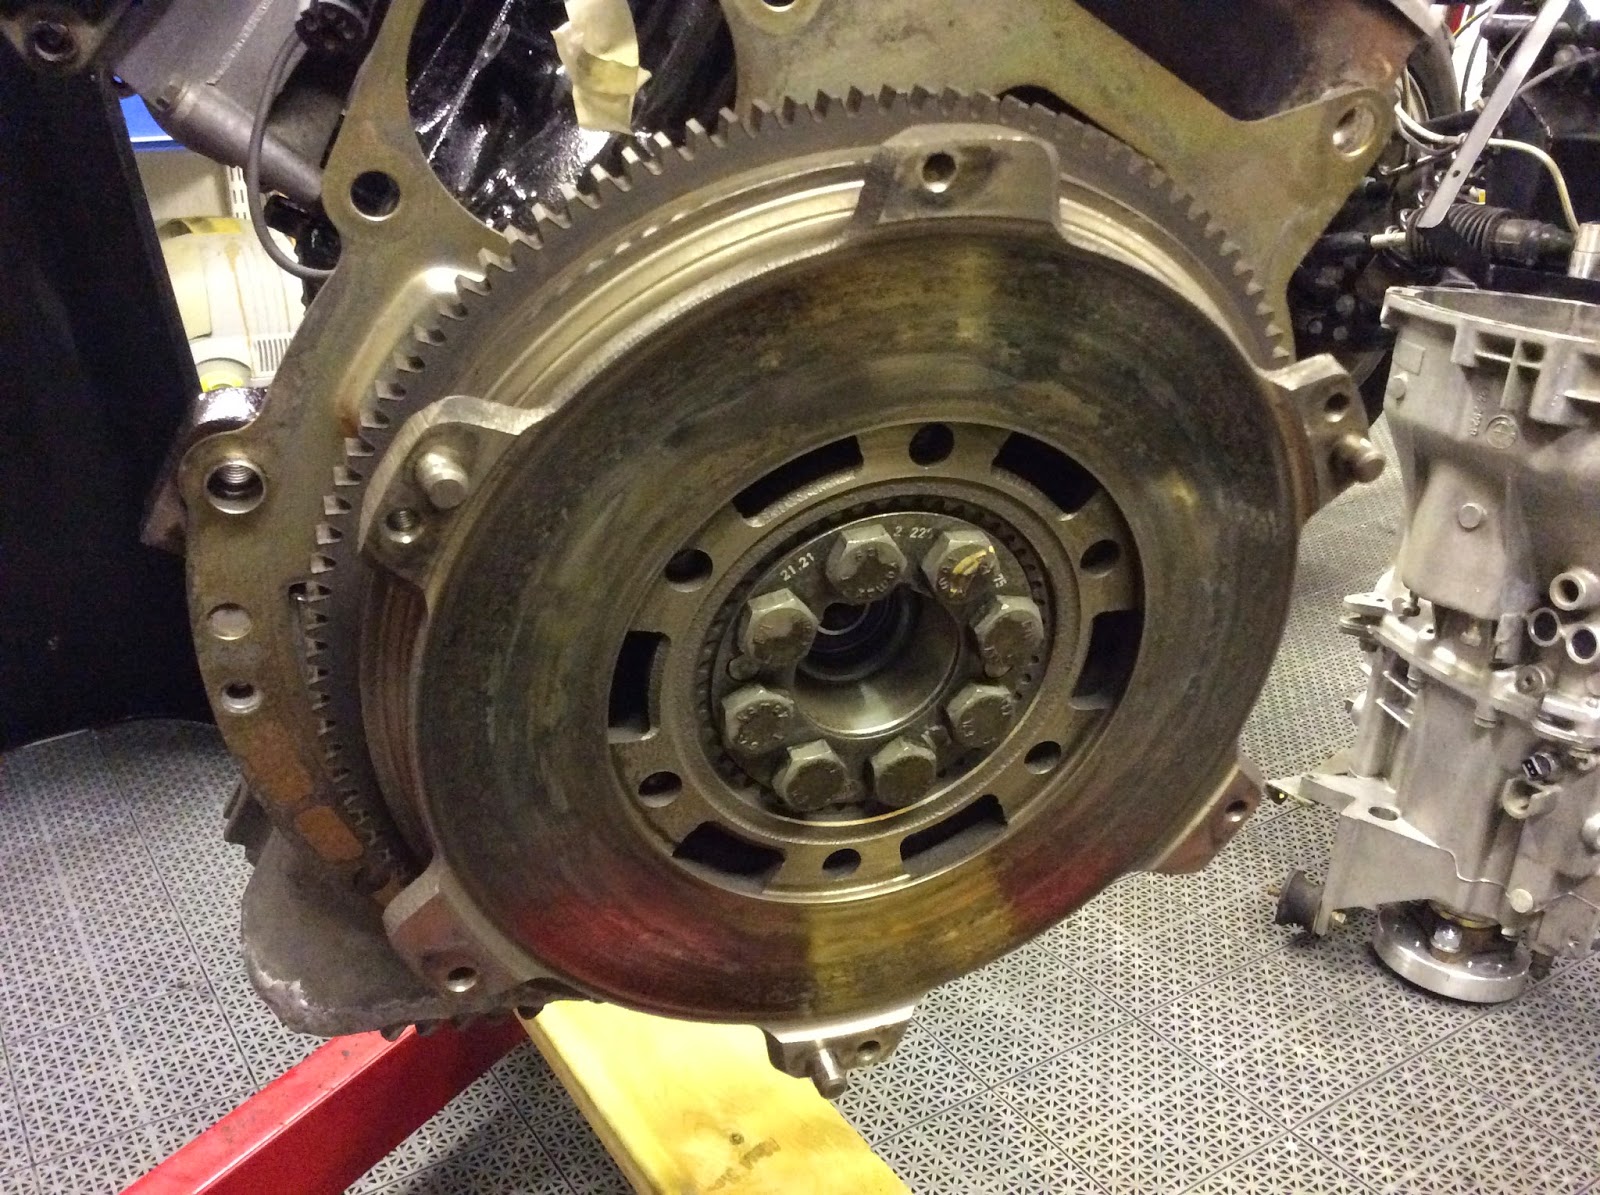
First a new pilot bearing put in place and then the M3 flywheel torqued to 120Nm also the clutch surface cleaned thoroughly with brake cleaner. 
Clutch pressure plate in place (also cleaned with brake cleaner). Used a socket to get the plate centred. Bolts torqued with a T40 to 24Nm. 
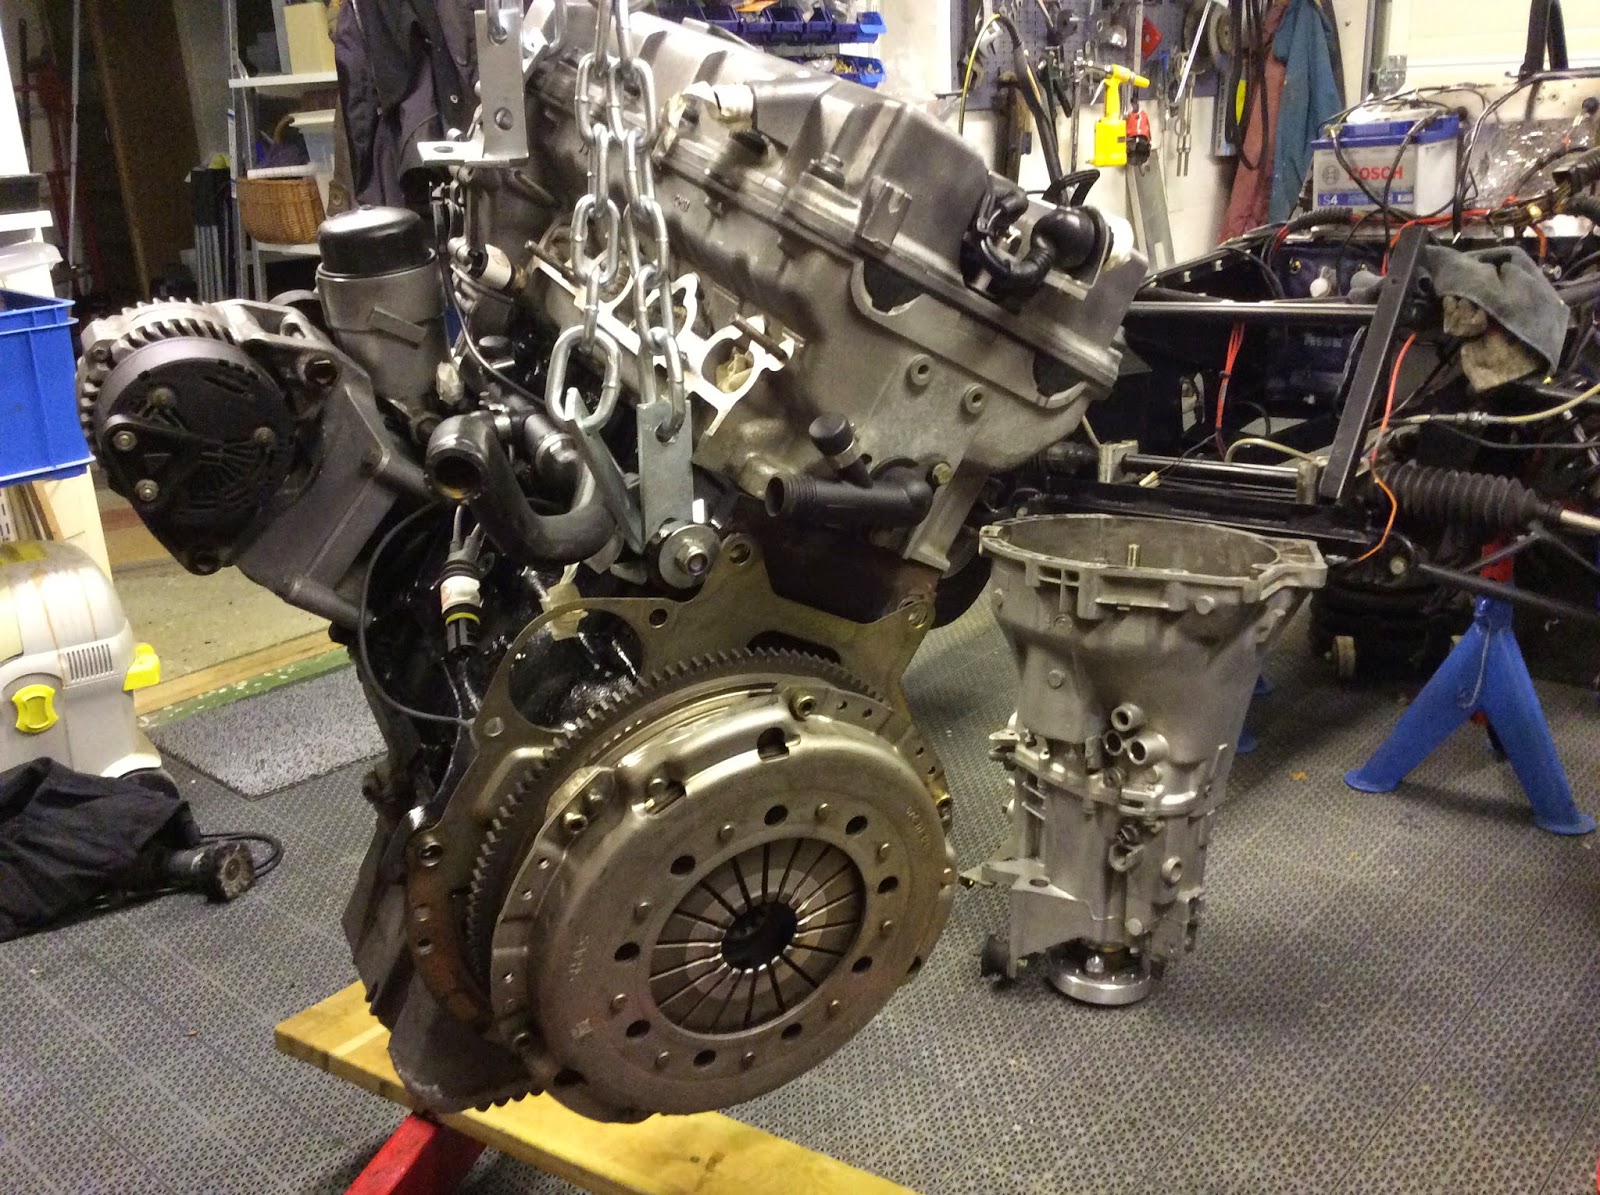
New big end bearings, ARP bolts, gaskets, throw out bearing, pilot bearing, M3 clutch plate, water pump, thermostat and oil filter. Second hand M3 flywheel and clutch pressure plate. I'm very happy it's all done. I just hope it starts eventually! 

Hope the gearbox slips on without problems tomorrow ....

Well we were lucky the gearbox just slipped on like a glove. Torqued all the bolts and it's ready to go in!
For some reason the engine didn't go in quite so easy as the clutch! There are a couple of heating pipes going across the ceiling so the engine lift could go to the maximum height.
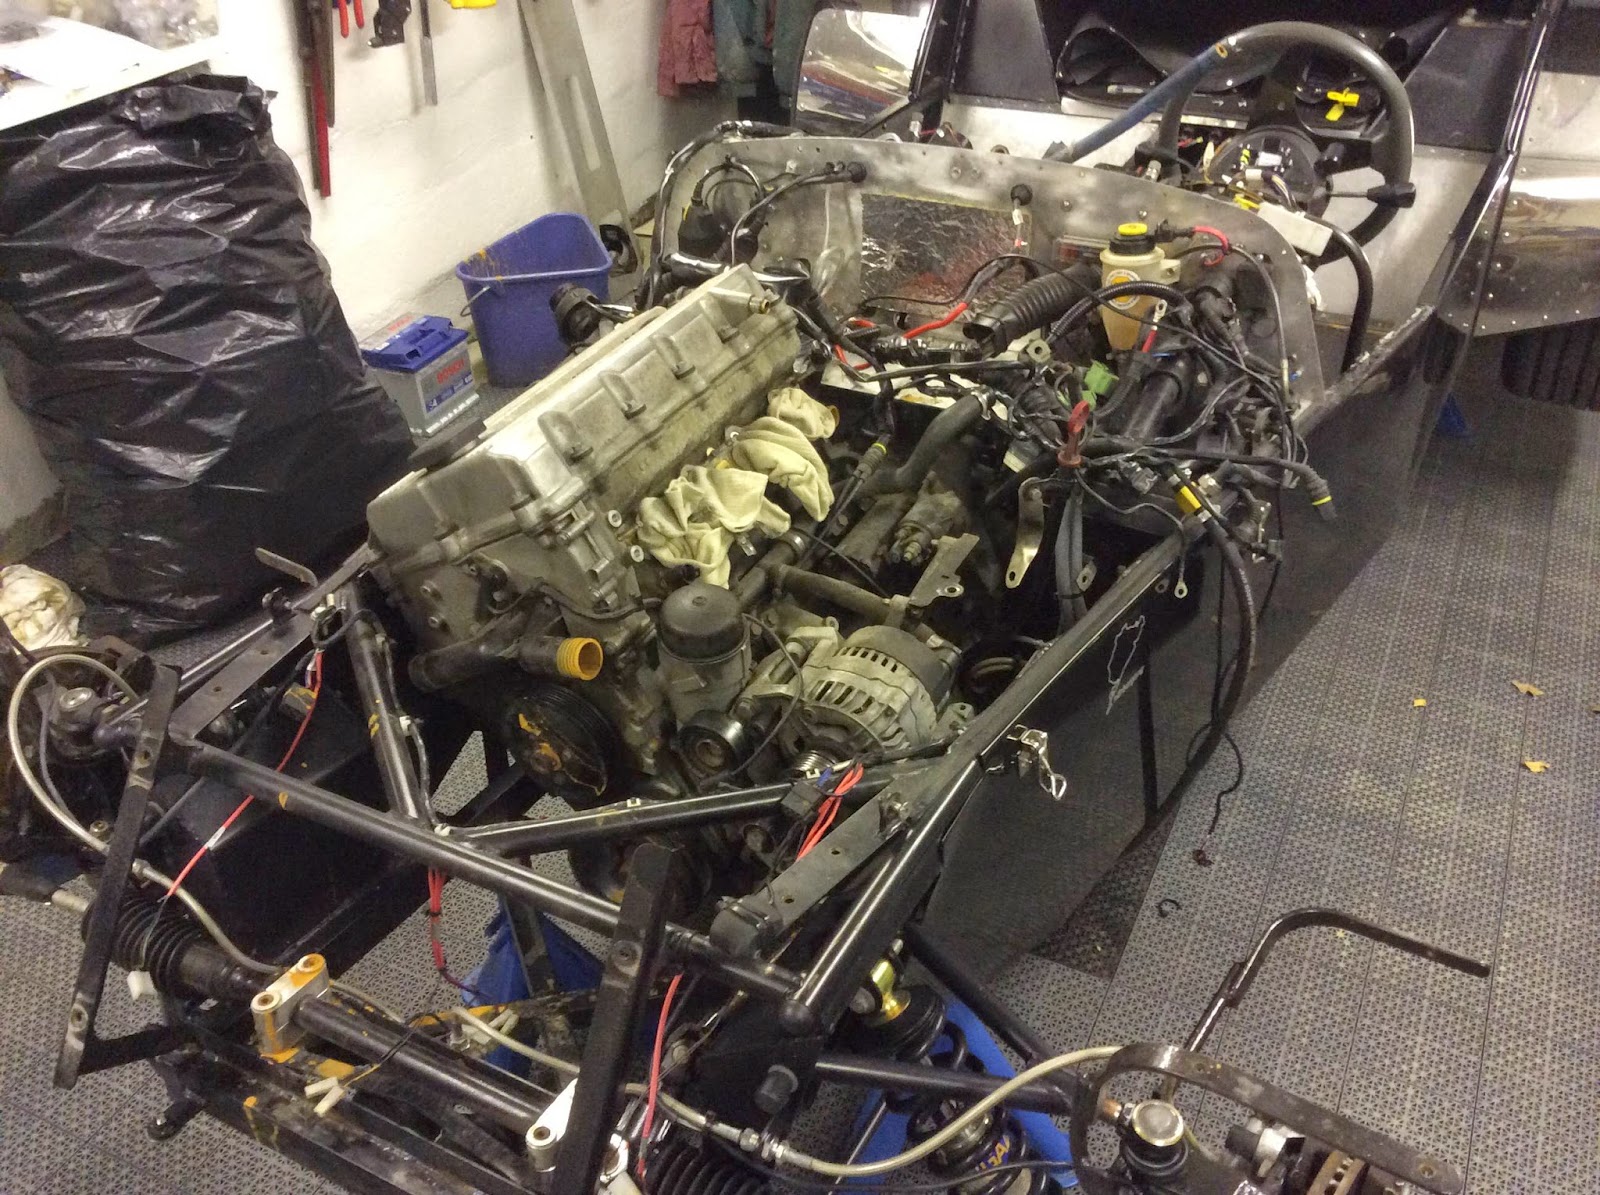
At last it's in, just a case of connecting everything. 
Prop shaft connected and soon gear lever arm.  
Lots of connectors to be plugged back in. Luckily most of them can only go back in one place.
This bunch of cables will be cleaned up later. New heating hoses go directly to the engine heating system leading to more efficient cab heating - hopefully. 
Fuel pipes next.
Super Charger in place. Bracket at bottom center is to take the weight of the SC off the inlet manifold. 

Fan belt in place.
First part of the exhaust manifold bolted in place.
Second part ...
Third and final, everything buffed to a shine. 
Filled with oil and a new filter. Just the clutch still needs bleeding.
Radiator and hoses in place.
I've replaced the throttle valve switch (center) and will change the idle regulating valve next (right center)

Tuesday, 6 January 2015

Happy 2015!

Where is the time going? It's now 4 years to the day since Fredrik and I were over in Kent collecting all the parts and engine. I wish it would slow down a little!

Unfortunately because I had to order the ARP bolts again I can't do any more to the engine, I intended to change the gearbox oil but then the engine has to be complete before the clutch assembly can go back on again. It's nice actually not to be stressed and it gives me loads of time to think of improvements. 

Last winter I fixed the heater control in the on position as it was always on anyway. It saved having a cold/warm control in the console that was never used. On a hot day I just wouldn't use the fan. Now I have removed the control altogether. I replaced the pipes and removed unnecessary connections to the engine water system. I have also added an air intake in front of the heater radiator as there was no way air could get in before which meant the pressure of the warm air pumped through the air vents by the fan was very low. 
Less joins in the in/out pipes. There are four output vents, two for the windscreen/dashboard and one for each side of the console. 
New air intake with a grill. I don't think any nasty things will be sucked in there, it's all covered by the instrument console anyway. The other hole is for cables. The fan is in the black casing behind the small radiator. A neat system that I found on Ebay.
Gradually getting cables sorted out. The windscreen water bag is now to the left below the battery. The connection block was there before but that's no longer needed.

Tuesday, 30 December 2014

Trying to get my bearings!

This engine parts replacement business is taking more time than I thought A couple of problems I created myself so I'm actually to blame for most of the delays. New water pump and thermostat arrived and were duly put in place, something else to tick off. Sump gasket, inlet and exhaust gaskets arrived from BMW as well as new big end bearings so I could get on with the next stage.   
Water pump and thermostat in place.

I've put off doing anything with the bearings because the ARP bolts I ordered took longer to be delivered than expected. They arrived today BUT are the wrong ones! Will have to order them all over again! But anyway I decided to check the crankshaft as well as check the clearance of the new bearings.
New standard bearings for my M44 engine. The two on the top are old, showing slight wear. 
New torque wrenches, wrong ARP bolts, plastigauge.
Sump removed,  con rods 2 and 3 sticking up ready for bearing checks.I marked each con rod and bolt so as not to get them mixed up.
A small amount of Plastigauge placed across the face of the crankshaft ... 
 ... before bolting on the bearing and bearing cover and torquing to 20Nm and 70 degrees
Dave mentioned the tolerance for the M44 big-end bearings (conrod) is between 0,02 - 0,055mm. Mine, at least nr. 3 as you can see is 0,025 which is very little wear. I hope the other 3 are just as good.  
I'll clean this off with some WD40.

While waiting for the parts I continued to clean up the wiring. I intend to shorten the spark plug feed and ODB II connector as well as many others.
Unnecessarily long cables. I'll cut and splice them.

I'll continue with other parts of the car until the new ARP bolts arrive. I hope they don't take too long!

Monday, 8 December 2014

Engine cleanup

The mega job continues, a little bit everyday!Tried quite a few tips found on youtube on how to clean an engine, especially the cylinder head but in the end, as I want to do it in situe, I found the best way was with an slightly abrasive buffing disk attached to a drill.
First thing was to get the engine up on the stand. 
Easier to put the bracket on straight and as central as possible and then attach it to the stand.
It's quite stiff so "almost" no worry about spinning round by itself.
Decided to change the water pump and thermostat.
Easier to clean area behind too!
To help get the old water pump out one can screw in long (40mm) M6 bolts into the two threaded holes provided in the pump. By screwing them in they push against the housing and force the pump out. One can also use a small crowbar to gently lever out the pump.
Old and new pumps, the new one has a composite impeller.
One tip was soaking parts in diesel for a week - it didn't work!
Painted areas of rust on the block with rust converter. Then used black engine block paint.
It'll look better when all the bits are put back on again.
As mentioned the best way I found to clean aluminium parts was with a slightly abrasive buffing wheel.These engine mounts have come out pretty well. 
Mount for the alternator and belt tensioner was a bit fiddly to clean. Alternator needed just a wire brush and then a blast of compressed air. 
Time to spend a little time on the bulk head, wire wool and a polish.

In the next few days the thermostat, ARP bolts, clutch plate, gaskets etc. should be delivered. Then need to remove the sump to remove and check big end bearings before ordering new.

Sunday, 30 November 2014

Clutch upgrade continues

I looked around for an M3 clutch and eBay UK and eBay US ended up being very expensive when postage was added. I then looked at eBay Germany and up popped a couple of second hand clutch assemblies including flywheel. Got in touch with one guy and ended up paying €200 for the whole assembly including postage to Sweden. Only a few days later all 18kg arrived! 
Little clean up required

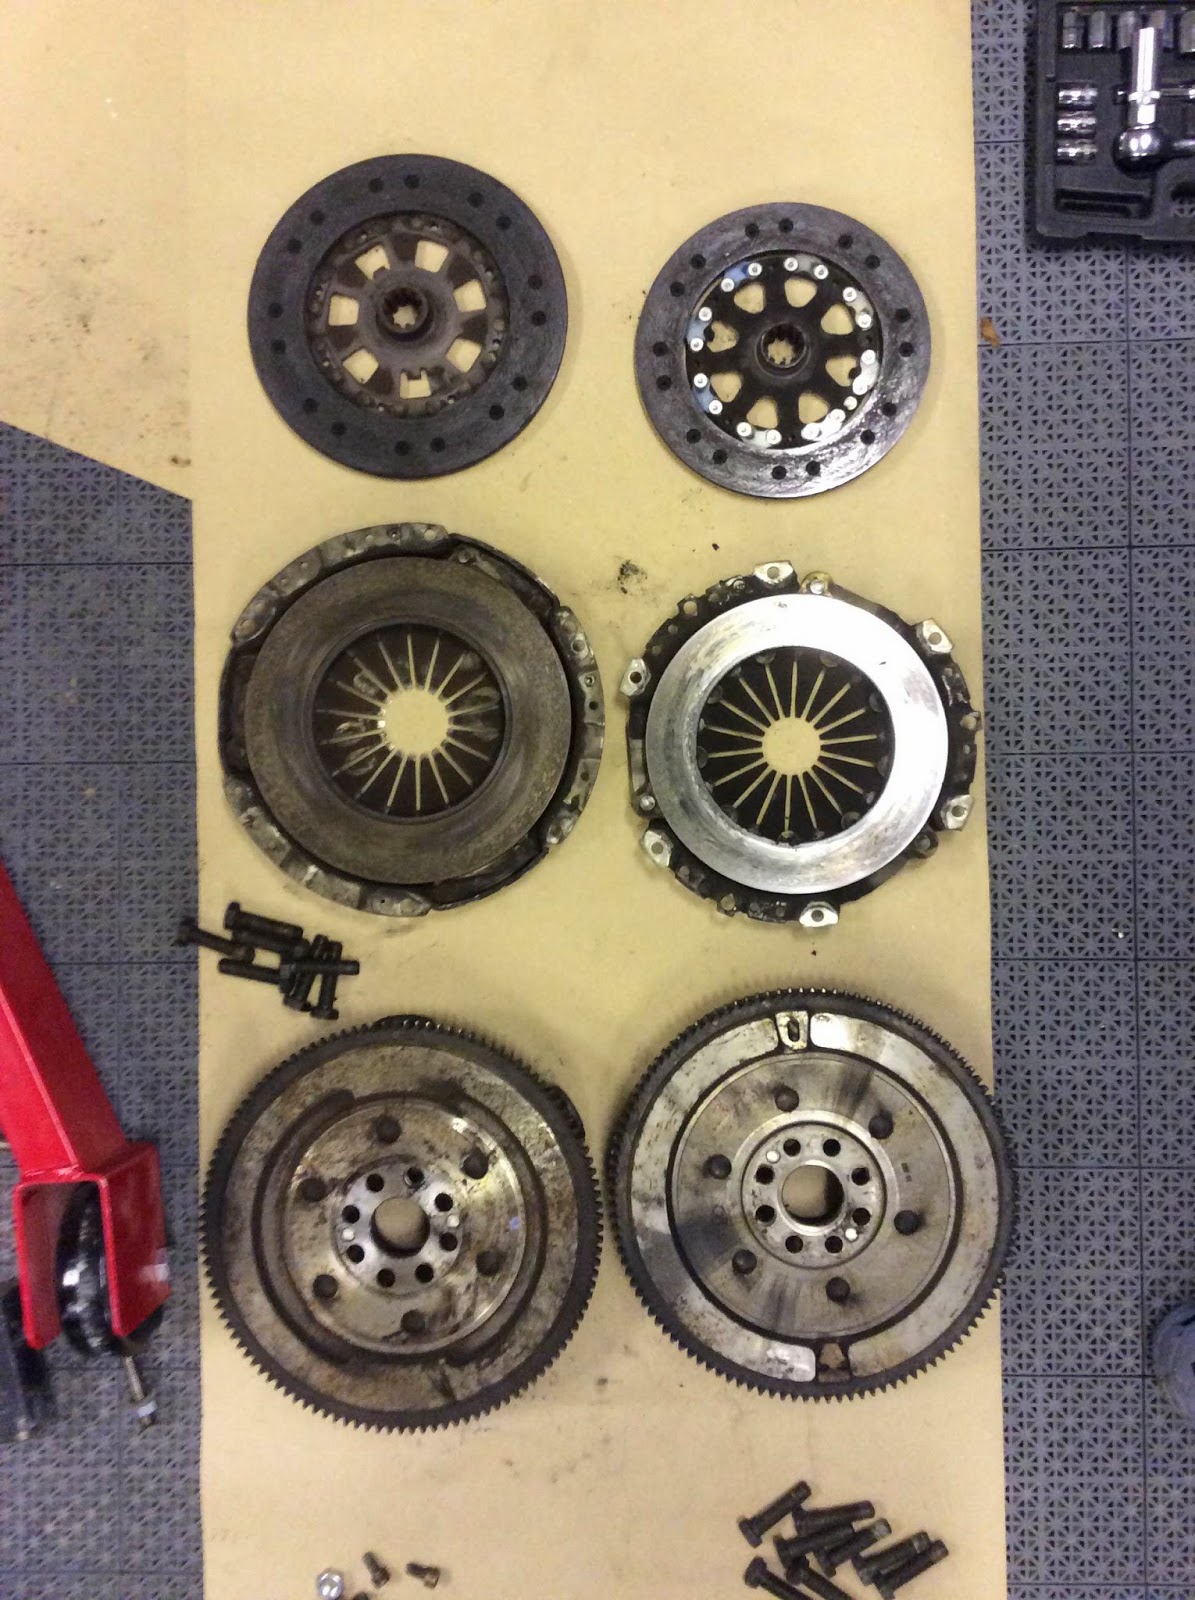
The clutch plate and pressure plate are much bigger than the M44 version but the flywheel is exactly the same size, same number of teeth, same mounting points etc. but the clutch space available is very much more.

Locked the flywheel in place and then easy to remove the eight flywheel retaining bolts.
Not sure whether I need to replace the retaining bolts, should be enough to add a little Loctite I would have thought - ideas? That goes for the  clutch pressure plate retaining bolts too?
Flywheel match! 
Flywheel removed ready to remove pilot bearing. Dave sent me a youtube link to someone who used bread to remove the bearing - well it worked for me too!

This is the new M3 flywheel temporarily in place. It should fit nicely into the gearbox housing.

Tomorrow I'll nip into the local BMW dealer and order clutch plate, release bearing, pilot bearing, inlet and exhaust gaskets, also considering changing to ARP bolts and replacing crankshaft bearings so will need a new M42 gasket as well (my M44 sump was replaced by a shortened M42). It will all be quite expensive but may as well replace as much as possible - if it's really needed!
Engine needs a cleanup and repaint.

Sunday, 16 November 2014

On to the engine

Now the engine's out it's time to clean and replace. As well as the clutch, Dave advised me to renew big end bearings and change ARP bolts. I may as well do as much as I can while the engine's out. Although it's really fun doing it I'm not sure if I want to do it too often! 
Alternator and bracket are now removed and the clutch pressure plate and clutch removed. 

The M3 version of the clutch is 240mm in diameter and the clutch for the M44 engine I have is 215mm. I don't think it will fit inside the lip of the flywheel unless I change the flywheel too. But then will the gearbox bell housing fit over it?


I tried sand blasting the engine mounts but the finish wasn't as good as I expected so I may spray paint them metal finish, maybe use Hamerite silver. The block I'll clean up and paint black and everything else sand or spray with a metal finish paint. 
Gearbox needs a clean up and change of oil.

As I mentioned everything was done to quickly to build the car, without too much thought to where things went or whether they were even used. I'm now going to re-wire at least everything in the engine bay. Also heating hose pipes were directed badly and those not being used were capped badly.
Most of this has to be connected before the inlet manifold is put back.

Monday, 10 November 2014

Winter strip begins

UPDATED
Hi there! Nice you could drop in. The weather has been slowly getting colder and wetter and even a small amount of snow fell last week. I thought it was best to start the winter jobs early so I'm sure (or pretty sure at least) that the car will be ready for the spring. The main job is changing the clutch so Saturday I put the car up on blocks and started removing most of the bits in the way of getting the engine out. 
The biggest problem was the cabling. Most of it was laying between the engine and inlet manifold so it was easier to remove the manifold and once the engine is out I'll spend time tidying up. It was also easier to get to alternator and starter motor cables. As the gearbox has to come out together with the engine, the seats, carpet, dashboard, console and heater had to be removed to to get to the gear lever linkage.
Inlet manifold removed. Spaghetti all over the place.
Spaghetti all over the place here too! It's a good opportunity to clean up. At least now I know where everything goes whereas when I was building it things were simply put in place without any particular order. 


Well during the week the car was stripped even more. Drive shaft was a real bugger to remove, upside down, blood flowing the wrong way. Must be less blood the older one becomes! Gear linkage and clutch master cylinder were straightforward to remove. Engine mounts etc were also easy.
Feels really great to have the engine out so I'm able to clean up and try and get it back to nearly new status again.
Will need to clean up the workshop a little, it's a bit cramped with car bits, tools and wine rack laying around - wine rack!
Gearbox is now off and I have access to the clutch. I need to double check that an M3 clutch and pressure plate fit inside the bell housing. I found a forum that says it does. I'll give the engine a good clean and sandblast some of it as well as change cam belt, water pump etc. 

I'm really glad that I started so early in the winter season, means I can take it easy and hopefully get things right this tie.

Here is a little time lapse video of the job so far!


Wonderful if one could work this fast!

Hope you can drop back soon!