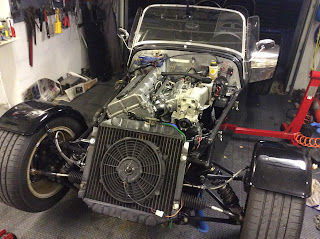
Steve's GKD Legend

Steve's GKD Legend
Still, On the road again!

Search This Blog

Sunday, 11 December 2016

The long brake is almost over

After a couple of days the new one piece hub arrived including bearing. Very expensive, almost 2000 SEK for BMW original. Maybe I should have gone for an oem on Ebay.
Used a 46mm socket to get the hub nut off.
Once I knocked the hub off part of the bearing was left behind. Always seems to be with bearings.
Easily removed with a puller.

I wanted to replace both shock absorbers as they were looking quite corroded, but after checking the price at Protech (around £95 each - ask for GKD custom shocks) I'll leave them until they are actually worn out. 
While waiting for the new hub I marked the position of the steering rod adjusting nut with white plastic tape. Then removed the steering ball joint and dragged off the rubber boot which had broken. Touched up the paintwork with silver ..
... and put a new boot on.
Cleaned up the spline, put a little grease on it and gradually tapped the new hub into place. The 46mm socket is exactly the right size on the edge of the bearing to lightly tap the hub on to the spline.
Once enough thread is showing tightening the hub nut (I replaced the nut which probably wasn't necessary) will push the hub onto the spline for it's final tightening (the ws manual says 290Nm). Then use a chisel or screwdriver to bend in the ring of the nut.
I bolted the disc into place and cleaned up and painted the caliper, got the brake pads in place and then bolted the caliper back in position. The black anti corrosive coating on the disc brake surface will be removed by the pads once in use.
The new rear pads fitted nicely in the caliper ready for the wheel to go back.

Wanted to first replace the connector for the rear light cluster as it's quite corroded after more than 5 years of driving. Also took the opportunity to clean up and remove some small rust marks on the frame and add silicon to some of the panels. Next step is to repeat the process for the left front and rear disc and pads.


Monday, 5 December 2016

Disc replacement

Hello again! Cold and dark here in Sweden. The roads haven't been suitable for driving and the car isn't MOT'd so can't drive it anyway. In the mean time I have a long list of jobs to do.
Should keep me busy for a couple of months.

I bought two brake disc kits from EBC as the current ones were, I believe, slightly warped.
Looking good. 

  • PD13KF113 kit including GD553 EBC 3GD Series Dimpled And Slotted Sport Discs to Fit Front and DP4914R Yellowstuff brake pads
  • PD13KR092  kit including GD554 EBC 3GD Series Dimpled And Slotted Sport Discs to fit rear and DP41079R Yellowstuff brake pads

Had to bash the spacer off
Disc removed as well as brake caliper
The EBC disc in place. 

But when I went to install the pads in the calipers they didn't fit! Called Peter and he told me the rear caliper comes from a VW Golf mark4 (Part No. ADB0797). Had to plead with EBC to swap the pads for the equivalent EBC P/N DP4680R. Will have to wait for their arrival. In the mean time started on the front discs.
Disc removed and calipers in but found the wheel bearing needed replacing! Will have to wait until that arrives too!
Will also change steering rubber boots.
Another job was to fix the fuel leak in the tank. I thought it was in the filler tube but then discovered it was also seeping out around the fuel level sensor hole (nearest). Removed the bolts added fuel sealant and rubber washers to help seal the bolt holes. I need to fill it up to check it worked.
Removed the roll bar as there was a little rust around the bolt holes. Requires a good clean and a rust converter first.

Now I have to wait for the front hubs and rear brake pads to arrive. Perhaps I'll start with the console in the meantime. Bye for now.

Monday, 31 October 2016

I name that tune

Haha! It's been a while but there is nothing much to report at the moment. Last weekend I drove the car down to Henrik in Vagnhärad about 50km from here. He'll continue to do the tune-up now the engine is back together. I'm hoping that it's just a case of setting the timing and getting the mapping modified to go with the improved engine. I definitely don't want any more major expense or news that I forgot something major! Today was the last day for getting the MOT (besikning) done. Which means once Henrik is finished it'll be a slightly illegal drive home. I'll then have to fix a few things to get it through the MOT. Otherwise I take it to the MOT and fix what fails.

Snow is expected in a few days so I'm hoping it won't lay. I hope also I'll be back here soon ...

Sunday, 16 October 2016

Half way run in

Yesterday I took a nice long easy drive past Stockholm and up to Norrtälje where Neil has just bought himself a house. The temperature was only around 5oC so had to wear a few layers to keep me warm. I didn't bother with the roof or doors so there was a bit of a breeze! It was actually fantastic getting out again even though I took it really easy, it's so nice to drive a long country roads during autumn, past lakes and forests. 


There and back was around 240km so I'm up to just under 500km (300miles) for the running in.

It was still running a little rough and stalled almost every time I had to stop for something. When I got home I checked the for leaks around the inlet manifold and everything was tight. I checked compression again and it was better than before. All four cylinders where over 16 Bar. At the same time I checked the spark plugs and all were showing signs of the engine being too lean. I'll talk to Henrik about it as I don't want to do any damage. Perhaps he will suggest tuning before going any further.
Grey, signs of a too lean mix or is this normal in an injected engine?

The fuel consumption also indicated it was a little lean. Just before the engine rebuild it was doing around 16 litres/100km, not surprising really with broken pistons. On my best ever day without the SC I got around 7 litres/100km. Yesterday it was also down to around 7, which I think is a little low - great but a little low!

Thursday, 13 October 2016

All fired up!

Another update :-) 

After a really restless night, thinking about what could have gone wrong I went down to the cellar this morning to try the compression one more time. Low and behold it shot up to about 15 bar (217 PSI). But why? Anyway wasn't going to worry about it, strait after work came home, tested again and same value. So on to the next stage. Drained the water and added the new fan temperature switch I received today and then filled up with half water and half Glycol. Put back the coil-overs, fuel pump cables and then turned the key!
Burst into life! A lot of oil burning off from here and there but that soon stopped. Revved up to a little over 3000 revs to fill the chain tension-er
 and then let it idle up and down between 2 and 2500 revs for 25 minutes. The fan came on so I know the thermostat  works - excellent!

Compression after running engine was:
Cylinder 1 = 16 bar (232 PSI)
Cylinder 2 = 15 bar (217)
Cylinder 3 = 16 bar (232)
Cylinder 4 = 15 bar (217)
Cylinder 3 showing 16 BAR

Now I have drained the oil and will fill with new synthetic oil and run it in for 3-400 miles. Just need to put a seat and a seat belt in and get a few other things bolted back. 
Almost a whole car again!

The weather is not so good at the moment, rained hard yesterday so I thought it best to put the windscreen wipers back on. Headlights are back on and working as well as the steering rod. 

Tuesday 11th
Fredrik and I tried to bleed the clutch master cylinder but with all the air out it still didn't work. The problem was the angle I had to insert the master cylinder was quite acute so the push rod had missed the release lever. All the bleeding in the world wouldn't have fixed it. To solve it I held the push rod in with a band of cloth and inserted the cylinder so it was in line with the release lever but not fully in place. Then slipped the cloth out so the push rod could seat itself nicely. Bled it again and it worked fine. 

Installed the drivers seat and belt, fixed the faulty front offside repeater and took it out for a slow drive around the neighborhood. 

Idling is unstable and it stalls but it'll improve. Main issue, I mentioned there were four ways to put the gear lever on and only one is right, well I chose a wrong way so in third gear the lever hit the driveshaft to gearbox coupling. Bit annoying as I have to remove the cab heater again. Will fix it in the morning ...

12th October
I fixed the gear lever without removing the heater box. Took it all out and started again.


This is what the BMW parts catalogue says for an M44, the bent part of the selector rod (8) that connects to the gearbox faces upwards. But because the GKD has a large cylindrical adapter between the gearbox shaft and the drive shaft, the selector rod must face downwards otherwise it will hit the adapter in certain gears.
The drive shaft adapter

This is how it should be

I put back the air-filter and filter housing, got the bonnet back on and took her out for 125 easy, trouble free miles. Kept the revs below 3000 most of the time and then a few times slow acceleration up to 4500 max and slowly back to 1500-2000 miles, stopping occasionally to cool down. The more miles I did the better the engine seemed to run. Still stalling most of the time at traffic lights but occasionally it would idle nicely. Starting the engine the revs inclined to go directly up to 3500 and back again to 1100.

Funny but having to remove the steering column to get the engine out and then putting it back, the steering has become much easier and smoother. As mentioned the gear shifting has improved. Early days but the fuel consumption has greatly improved too but I'll reserve judgment until the running in has been completed - another 375 miles left to go!


Sunday, 9 October 2016

Engine back in BUT!

Well I'm not sure whether I should celebrate or not. I definitely need some reassurance and advice! All was going well.
Starter motor in place. Get this in while the engine is out otherwise difficult to get to the securing bolts.
Neil and I put the engine in before breakfast, only took 30 minutes. I suppose this is the third, or is it the forth time it's gone in so we should have the hang of it by now.
All the drive shaft bolts should be put into the holes in the diff side before lining up the gearbox holes otherwise it's not possible to get some of them in.
This is how the gear lever goes back. Otherwise it will hit against the drive shaft connector.
I put the SC on once and didn't like the way the engine bracket fitted so took it all off and started again. Besides I inadvertently swapped a couple of sensor connectors and they are under the SC.
Pulled all the fuses out as I didn't want the fuel pump on when testing compression. Ended up pulling the connectors off the pump as none of the fuses disconnected it.
Injector rail bolted back on and temperature sensor on the inlet manifold connected up.
Exhaust manifold on. Also the rest of the exhaust, Lambda, radiator, hoses etc.
Put all the plugs back in except cylinder 1 and tested compression. 12.0:1, which is pretty good.
Cylinder 2, one where I changed piston and rings was 13.5:1. Isn't that very good? Then I tried cylinder 3, no point in showing a photo as there was absolutely no compression, zero, zilch!
Cylinder 4 very good too ...
14.5:1

So why is cylinder 3 showing nothing! It has a new piston and rings. The valve seatings were tested and A-OK. Someone please tell me it's completely normal and it'll simply burst into life and, most importantly of all - I won't need to take the bloody engine out again!

UPDATE: I put a little oil into the spark plug hole and checked the compression - no difference. So I waited an hour for the oil to settle and tried again. The compression went up slightly to about 2 bar. I also took the valve cover off and all the valves seem to be working fine.


Tuesday, 4 October 2016

Gearbox woes and triumphs

Managed to clean the valve cover as well as replace all the gaskets, then dropped it into place before torqueing the bolts. Bolted on the alternator and one of the engine mounts. Then Neil and I tried to get the gearbox on and bolted but after an hour gave up. Didn't really know why, had the same with my Beetle many years ago; one time I tried for hours. Next day I tried and the engine just slipped into place! 

Tonight tried again but first removed the clutch pressure plate and made up a tool to get the clutch centered properly. Also made sure the spline was slightly greased. Also decided to get the engine positioned properly with supports under the sump and engine mount. 
Engine more stable than before.
And basically horizontal.

Unfortunately my helping hand was busy so will leave the gearbox for later in the week. Instead quickly cleaned the inlet manifold and bolted on the super charger ready for later.

Update! 
I used my motorcycle lift to get the gearbox up to the right level and gradually pushed it in. No problem at all, slipped in like a glove!


Sunday, 2 October 2016

Head and chain

The biggest time consuming part of the engine rebuild is missing ordering parts and then having to wait for them. Mind you it has given me time to do other jobs on the car plus time to double check things.
I replaced Nr 2 piston, so that's all four back in place and rotating nicely on the crankshaft. 
Cleaned up the surface towards the sump and put a little gasket paste on the joints between the rear oil seal housing and front seal housing.
Cleaned up the sump and then bolted it on with a new gasket. The sump is actually from an M42 engine as the M44 gasket won't fit. GKD offer shallower sumps for better ground clearance and I got a cut down M42, fits perfectly!

Replaced the head gasket, carefully lowered the head onto the block making sure the pistons were 90o off TDC and the camshafts were at TDC. I spent some frustrating time torqueing the head bolts down. First stage was 30 Nm and second and third stages to 90o each. The tool I used to check the degrees kept slipping so quite difficult to do on my own.
Once the head was on I turned the crankshaft back 90o so piston 1 was at TDC. Then got the timing chain on and the chain guides and chain tensioner. I then tried to turn the flywheel to see that everything rotated okay. Basically impossible and thought I'd done something wrong so took the chain off and started again - same results! So decided to get the crankshaft pulley on and turn that instead and it worked fine.
Chain sprockets on.
Still some small adjustments to make with the camshafts and sprockets.
Lower timing cover on and new gaskets
Crankshaft pulley on but not tightened to 330 Nm yet. At least the crank can be turned using it.
Changed water pump gasket ..
.. and in place
Upper timing chain on and new gasket behind the thermostat recess.
Thermostat bolted in place with in and outlet to the radiator.
Water pump pulley in place
New sump gasket and sump bolts torqued to 10Nm. Almost ready to put back in the car, just a few more things to bolt on, cylinder head cover, alternator, engine mounts etc. The rest can go on when it's in the car. If all goes well probably Tuesday with help from Neil.