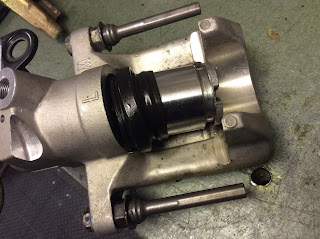
I've taken things slow and easy since the last update. The offside rear caliper had to be cleaned up and opened to be able to get the new disk between the brakes shoes.
The piston had to be screwed out to be able to clean it up.
Finally out
When putting the piston back put the sealing ring on first
Then push the skirt of the seal into the groove of the piston housing, while the main part of the seal is still around the piston.
Once it's located onto the bolt, gradually turn it clockwise.
Almost in
New pads in place ready to put back. Handbrake arm on the right.
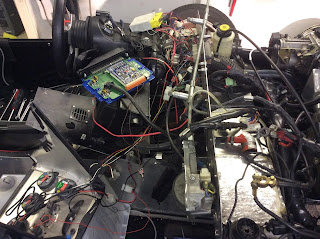
Trying to tidy up some of the spagetti wiring. Maybe I mentioned this before but if I had my time again, I'd redo the whole lot!
Spagetti from another angle
Wanted to have a way of checking the oil temperature so decided to add a Y-Adapter-M12x15-x-M12x15-x-18-NPT to allow the original pressure sensor along side the temp sensor.
The first stage of putting in an oil temperature gauge. The brass Y-adapter goes in place of the oil pressure sensor.
The temperature sensor was quite long so had to drill out the adapter a little to accomodate it.
Pressure sensor goes back in. Had to remove the inlet manifold and SC to be able to reach the outlet for the pressure gauge.
Very little space for the adapter so it had to be put in place before the sensors were screwed in. Had to add two brass washers so the adapter when tightened, ended up facing the right way.
Temperature sensor in and wired up. Now have to put the SC etc back on - for the 10th time!
The oil temperature gauge is not great but better than the Prosport gauges. They were quite expensive for all of them and now after only a few years the plastic covering the displays is scratched so all difficult to read. It's not like I haven't taken care of them. Maybe next winter I'll invest in real glass gauges.
Front offside steering and new brake disk and caliper in place.
I finally removed the MAF and replaced with a straight pipe to the airfilter. MAF not needed anymore because of the new setup, temp sensor and vacuum sensor on the inlet manifold as well as the after market ECU.
Added plugs and sockets so the console can be removed easily
Gradually putting bits back.


Pro-tip: it's about 1,000,000 times easier to do the rear pads if you undo the nut attaching the calliper to the other bit (calliper carrier?) - top left / bottom left nut in first picture - and leave the carrier bit still attached to the car. Then just pop the pads over the disc and the calliper slips on top. I learned this recently after doing it wrong a large number of times...
ReplyDelete