Steve's GKD Legend

Steve's GKD Legend
Still, On the road again!

Search This Blog

Sunday, 17 April 2011

The great escape begins!

I arranged the digger, found someone who wanted the soil and borrowed a dump truck from work to transport it. By the time Saturday had finished 6 loads had been moved to someone elses garden. I hope the calculations are correct and I can actually get the car out!
Freddie and I moved the wood!

I marked out the bit to be removed.

Not much left to do - yer right!
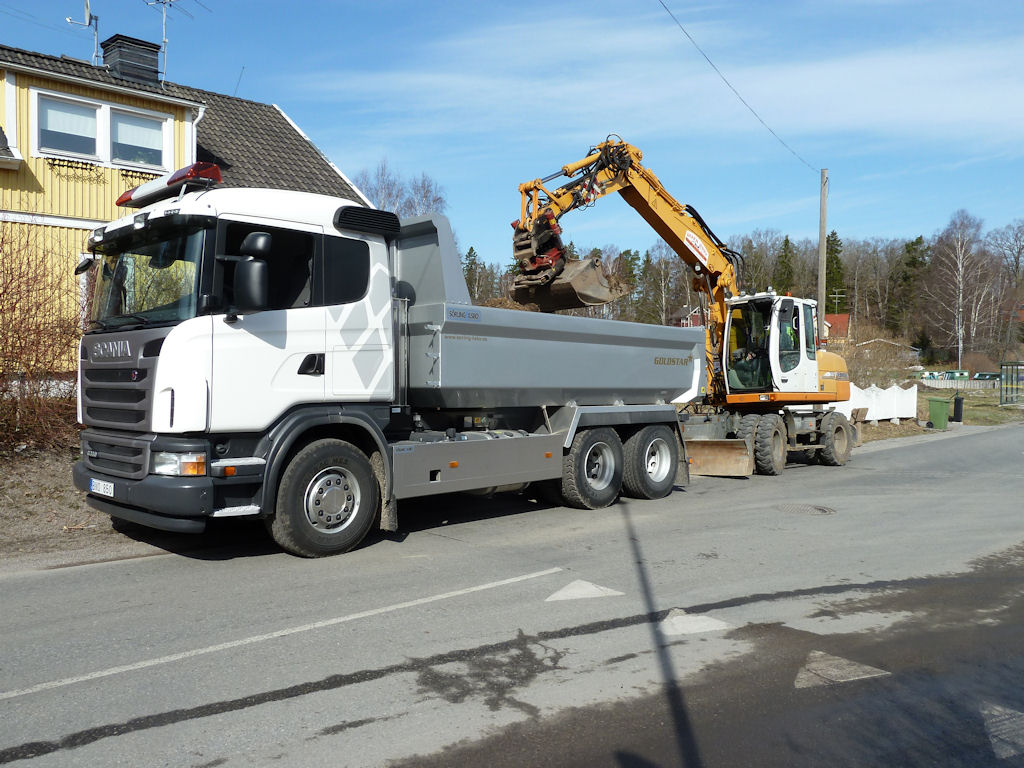
Scania G380 - I was worried about scratching the paintwork!

The next step is to put up supporting walls, I don't want the neighbours garden falling in on my car! I also have to get a layer of 0-30mm stones and then finish off with small pebbles.

I also managed to get a couple of things done on the car. Engine fan, quite a few double cable connectors and I also levelled the car as it was difficult  to see if anything else was straight.
Radiator fan installed

Installed the battery connector next to the coil pack (I still don't know what I connect to it or from it!)

The side hose that needs to be cut and plugged. I hope this M16 bolt is going to work!

I placed the nose cone in position again, this time with the car and nose cone perfectly horizontal and there is large gap on the driver's side between it and the chassis, where as the passenger side fits nicely. 

If I push it down to remove the gap then the bottom of the nose cone is misaligned as well as the nose cone is no longer horizontal. What to do?

I'm hoping that my trip to the uk in two weeks will solve a lot of unanswered questions that are stopping any real progress. I want the car up and running within 5 weeks (that's when the garage door should be here and installed) so latest 22nd May - that's positive thinking for you!


Sunday, 10 April 2011

Spring is in the air!

The last of the snow has just about melted, I reckon it'll be gone by Wednesday, my youngest son Fredrik say Tuesday! Not so much time on the car this weekend as I had to fix the wooden decking which was crushed when the snow slid of the roof, then raking leaves and then started moving the wood pile which is in the way of getting the car out. I attached the radiator and pipes.
The toe out is really apparent
Pipes in place. I had to tap out the thread for the fan temp sensor as it as M8 and not M14

I'll get the fan attached to the front of the radiator once I get the attachments which were missing from the box! Then it was on to attaching the nose cone and headlight bar. The Dremmel with the small round barrel shaped sanding attachment was great for taking away fine areas of fiberglass.

I temporarily fitted the headlights and realised I'll need to change the glass as they are UK and not for left hand driving.

I placed the scuttle in place, attached the BOSS kit to my new steering wheel and put it in place in the car. I hardly have any vertical movement to adjust the steering column - I hope the SFRO people won't fail it on the view of  the instruments.
X marks the spot - I put this here to stop me cutting out the wrong side!

I got the second fuel sensor sent to me in the  post but unfortunately it was broken when I got it. I'll check with BMW how much a new one costs or get one from e-bay.
Seats and steering wheel temporarily in place.

Can someone help me here? The original place for the accelerator cable is the hole on the right going to the slot behind on the right. The bonnet won't clear it in this position so I was going to simply move it and use the hole and slot on the left and then cut the rest of the bracket away - sound okay? Also does anyone know where the hose marked with the white arrow goes?

Sunday, 3 April 2011

Great Weekend

It's been one of those weekends where nearly everything went well. Handbrake cables installed and only require adjustment once the brake fluid is running nicely through the pipes.
Two black cables running from left to right, adjustment made with the nuts on the left.

I was a little confused how they connected to the rear calipers but it seems they lie in the slot like this:
The black cable ends here with the metal end being squeezed in the caliper mount

Because this is a left hand drive, it's a bit of a squeeze with steering shaft, cable harness and brake/clutch fluid reservoir on the same side. Peter suggested I put spacers to lift out the reservoir so I did and at the same time I cut some chrome pipe, usually used for water piping. The extra long bolts I made up fitted nicely through them and even if I say it myself they look bl..dy good!
Brake and clutch pipes attach to the cylinders behind the pedals. The pipe going through bulk head is fake, it's not connected!

I'm pleased with the way the cables, battery etc have turned out. I made up a small bracket to keep the diagnostics plug in place and the coil is placed down beside the engine bolted to the bulkhead.
 
Coil can be seen standing up in the lower left.

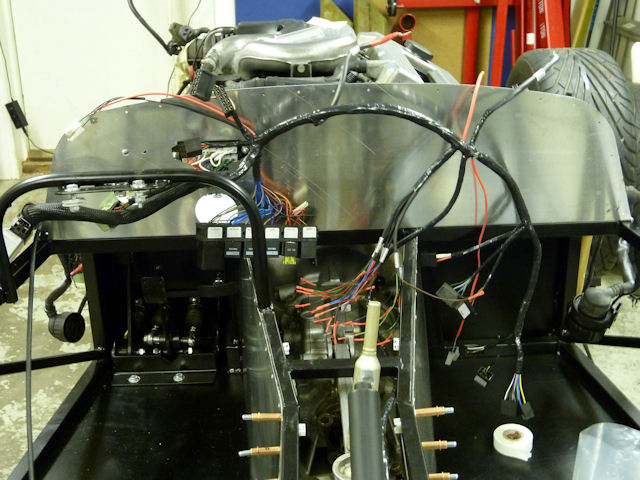
The last few job of the weekend were to screw the ECU (looks a radio on its side), relays, battery cable holes through the bulkhead etc. There are loads of cables to connect but I don't have the spade connectors yet. Oh yes I connected the fuel lines to the engine so it won't be long before she can be fired up!
Gradually sorting out the spaghetti but it's well marked spaghetti!

Friday, 1 April 2011

Free Friday

All the new brake pipes are installed and even the new track rod ends which GKD Peter kindly sorted for me. They are a little longer than the others but SFRO will be happy they are not welded!
The old and the new

Next thing on the list was the propshaft. I removed the gear stick linkages to give more space to tighten up the 3 bolts for the adapter but specifically the 6 hex bolts keeping the propshaft to the adapter.

It's easier to put the 6 hex bolts in their respective holes before putting the propshaft in place.

Once the shaft was in place and tightened up I put back the gear stick linkages but then the lower linkage, shaped like a mini golf club(!) was tight up against the adapter so the shaft wouldn't move!


With help I found out the lower linkage can be installed in four different ways so it was a matter of just turning it around so the club part was towards the gear lever. 
The rear propshaft mount on to the diff.

Next job was to cut the hole in the side panel for the exhaust pipes. Attached the pipes and then marked on the frame where the hole should be. I had to remove and then screw them on three times to get the hole right. Nice that included in the kit is a polished aluminium surrounding which will cover up any small mistakes.
Exhaust and lambda sensor holes

The other job I have to remember to do is get the "exit" sorted out. There's about 5 cubic meters of fire wood to move first ...

... and then get someone to come and dig out about 35 cubic meters of soil; oh and then install a garage door. I've got the next few months covered!
It's going to be a tight fit out and around to the right.

Sunday, 20 March 2011

A few steps forward

I found out it was quite usual to have a micro leak or so in old modified sumps, I shall try some metal putty to see if that fixes it. The thought of changing the sump didn’t fill me with enthusiasm at all.

I started checking the BMW cable colours and ended up using a pair of magnifying glasses. The coloured strip on most of the wires is thinner than necessary! I have to buy the double crimp type cable terminators as the single ones are not at all recommended in Sweden, I’m not sure about the UK. As I mentioned the GKD cabling is marked very well so it’s just a matter of matching the colours plus the help from the guys on the GKD forum is invaluable.

I’m trying to finish odd jobs so I placed the petrol tank back in position and was wondering whether there should be rubber in between the tank and support brackets to stop vibration. I’m waiting for the second fuel sensor to arrive as well as the large aluminium washers to keep the senders in place. Fuel pipes are in place and cable tied as well as the front and rear wiring looms.

I can’t cut the hole for the exhaust pipes in the side aluminium panel as I haven’t got the gaskets for the manifold; should arrive tomorrow; don’t want to cut in the wrong place. Hopefully also the brake pipes will be ready to pick up tomorrow as well so I can get them installed. Lower steering arm photos are still at the IVA inspectors, hopefully they will be accepted. The track rod arm challenge is with Peter so hopefully he will come up with a solution soon.

I really dislike having so many jobs half finished.

Saturday, 19 March 2011

Not a good Saturday.

Started off today with quite a bit of enthusiasm, got the rear panel bent into shape. I first drilled the holes for the bottom edge of the panel and then inserted cleco fasteners to keep it in place. I placed a few clamps on the top edge and then gradually put my weight evenly on the side edge of the panel and kept pushing little by little removing and reapplying the pressure. Once bent, a few more clamps kept the sides in place. I'm not going to attempt to bend the top edge yet, not sure if I'll get the panel off again. 
The new panel has the hole for the petrol filler already cut out - nice!

Then I started laying out the main wiring loom and tried to work out what everything was and where it went. The wiring is extremely well marked. The problem came when I noticed the bulkhead panel had the holes for the fuse connector, relays etc on the same side as the steering wheel. The RHD version has them on opposite sides. I'm just waiting for confirmation from Peter that they should be on the passenger side.

I believe the holes just above the row of relays should be on the right, the passenger side!

Another worry is the small leak I noticed coming from the shortened sump. It looks like the weld and definately not the drain plug. I've got the feeling it's going to have to be changed, hopefully I can leave the engine in but it will still mean removing the gearbox. Happy days!

Took about 10 or so hours to leak this much.

Hopefully tomorrow will be a better day!

Tuesday, 15 March 2011

Had the first Test today

A guy from the SFRO (IVA) came around to the house tonight and did the first test. In Sweden there are two tests before the MOT test. It's a good idea as there could be a need to modify some basic bits before building too much. This is basically what happened tonight. This is NOT UK IVA!


  • All the brake pipes must have the connectors changed to the "pressed" on type and also be surrounded by a clear plastic tube for shielding.
    • no comment, apart from the clear plastic will keep them looking newer, longer I suppose!
  • The fabricated lower steering shaft must not contain welds.
    • Maybe I can get one made up.

  • Track rod end must not contain welds. Swedes are a bit strict on welded joints but apparently they have had one or two accidents with welds giving way!
    • Perhaps I can buy one the same length without the weld.

  • Cannot use a 4 point safety belts!
    • Bit daft this one, I just have to disconnect one of the shoulder straps from the anchor point! 4 point encourages street racing
  • A comment: The total weight of the vehicle + fuel + driver (70kg) plus 50kg (extra!) must exceed 6.666 Kg per kW(103) = 686kg.
    • I have no idea at this stage but I'll add something heavy if needed!
  • Sound level must be under 84dB - no idea at this stage what it's going to be. Told there was an I-Pod app to measure this.
Apart from that everything was fine, I can use my sports steering wheel with boss connector, long extrusions like switches etc. are totally okay for the dashboard etc.

VIN number punched into the chassis
Overall I'm a little disappointed as it would have been okay in a UK test (I presume) but better to find these things now than later. The next test I'll have to trailer it 130km across to VästerÃ¥s but that is when it's all complete. But for this task there's going to have to be a bigger hole in the wall than just a door! 

Saturday, 12 March 2011

Running up to the first IVA

I contacted the Swedish equivalent of the IVA (SFRO) and a guy can drop around almost anytime. I don’t want to do too much before the first test so I’m just doing odds and ends. Bolted the engine and gearbox mounts including attaching the earth strap. I still have to torque the gearbox bolts to the engine.

I was abit worried about a belt adjuster not fitting because of the chassis but then I realised it was the air conditioning belt tensioner so didn't need it anyway! There seems to be plenty of room infront of the engine, perhaps there will be space for shopping bags!

Fitting hoses next.

I thought I better check the fitting of the exhaust manifold and it fits really well. Hopefully it will be fairly easy to cut a hole in the side paneling for the pipes to go through.
I need to buy manifold gaskets and new bolts.

Next I fixed the gearstick bracket and the handbrake bracket, both fairly simple but a task to tick off the list at least.
The gearstick is now tightly in place, it'll look good with the new covering I bought!

Handbrake attached, just need the cables attached to the rear calipers.

On to the back and attached the fuel tank brackets temporarily. I had to modify the bends slightly at each end as they didn't sit parallel with the chassis. The manual is a little vague about the brackets so I'll leave them attached by only the front bolts.

The tank strap is the one in the centre. The tank is raised and put in place from underneath and then a strap put in place at each side to stop it falling back.

I'm a little concerned about the electrics, what to keep from the donor and what to remove. The engine is also wired as a right hand drive so I need  to swap the harness so it comes through the dashboard on the correct side. I'll wait and work this out after the first IVA. 


Thursday, 10 March 2011

Engine in!

Made some good progress this week, added the twin roll bar, sorted out the sump and put the engine and gearbox in. The roll bar was pretty straight forward as it fitted very well and it looks great!

 6 bolts on either side and job done!

Next job was to change the sump to a shorter version. I forgot that my engine is actually the M44 version of the BMW 318is model as it is very similar to the M42.
The car is very low to the ground so a normal sump would bottom out, a shorter sump solves the problem.

The sump I got from Peter was for the M42 and I realised something was amiss when I removed the old gasket. The sump has a recess for the rubber gasket whereas the M42 sump is flat and takes a cork(?) type gasket. More consultation with Richard and it was a matter of just changing to the new M42 sump and using a flat M42 gasket.


Once that was solved I then realized the M42 sump was pre 1995 which meant the bolts required to hold it to the engine block were 18mm instead of 30mm. I ended up buying 18 new shorter bolts as I didn’t fancy shortening all the old ones!

Then there was the dipstick guide that was obviously too long, I used a plumbers pipe cutter to shorten it by about 2 cm.

While the engine was on the stand I took the opportunity to clean it as well as change plugs and oil filter.
The filter is the type without a nut so it has to be gripped and turned. I ended up buying a great little tool from my favourite store "Jula"

Neil came round tonight and we spent two hours bolting back the gearbox and after a bit of giggery pokery managed to manipulate both gearbox and engine into the tiny engine space and onto the rubber supports. Looking closely at the mass of components on the left side of the engine I just hope there is room for the steering shaft etc. All in all I’m very happy so far!
Had to remove the rubber mounts on one side plus the mount housing on the passenger side just to get the engine to slip into place.

Very happy indeed but what challenges lurk around the next corner!

Sunday, 6 March 2011

On to the engine

I bought an engine lift and stand yesterday from a place called "Jula" a large chain of hardware stores selling everything especially great and fairly cheap automotive tools. Even if a tool is used only once it's worth buying, that's my policy. One can always put it on e-bay (blocket.se) if space becomes an issue.
The engine is very front heavy so the balance bar comes in handy.

The engine stand didn't fit because of the clutch assembly stuck out. At first I thought I'd have  to take off the clutch and flywheel but with the help of Richard from the GKD forum I managed to solve it. Bought a length of hardened 12M bar, chopped it into four lengths and then used washers and nuts to keep it nicely in place against the engine and stand. I was a little reluctant at first to let the stand take the whole weight of the engine but it worked fine.
 I couldn't bolt it to the sump as that's what I need to take off and swap with a shortened version. It's fairly central, good enough to enable the engine to revolve.

 Engine nicely on the stand and fairly easy to revolve it. I got a floor covered in water once the water drained out!

Oh and I fixed the front caliper thread problem, I ended up buying a M12 1,5 tap and re did the thread, perhaps some sand got in there when I sand blasted it. Car is now on the ground supported by all four wheels and nothing has dropped off - yet!
Not that I have adjusted anything yet but I seem to have quite a bit of Toe out and the track rods are wound just about all the way in. Alice is the first passenger!