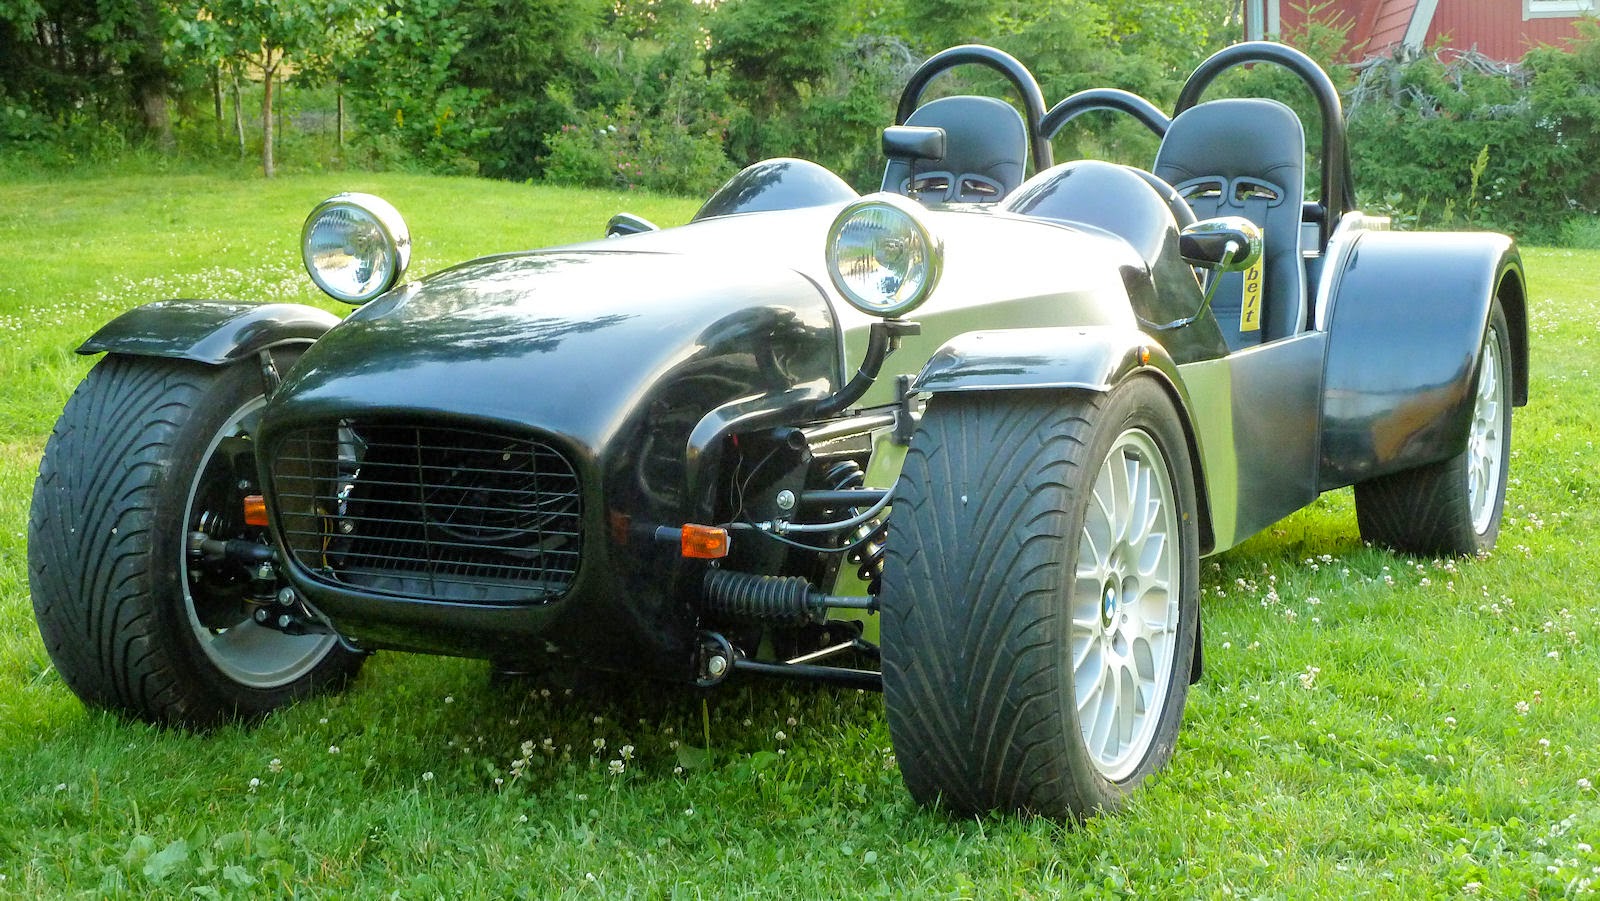
Steve's GKD Legend

Steve's GKD Legend
Still, On the road again!

Search This Blog

Thursday, 28 August 2014

Three year Anniversary!

Welcome back! How time flies! Wasn't summer fantastic? The hot weather started the day we started our vacation at the beginning of July and kept going until the day we went back to work 4 weeks later. I managed to get out in the car for several day trips but not the long trip I was hoping for. Never mind there is always next year. The car has now passed 16,000 miles (28,000km) since it went on the road three years ago.

Two weeks ago I felt the clutch slipping so have been taking it easy ever since. Found out that because I installed the super charger the standard clutch wasn't able to cope with the extra power. I need to upgrade the clutch to either a 328 or M3. This I'll do over the winter along with all the other jobs I need to do. The MOT is in 3 weeks so hopefully the clutch will last that long at least. Funnily enough, having taken it really easy with the clutch I tried an empty tank test. I passed the magic 300 mile on a tank of fuel for the first time. Fantastic really, 500km on 35 litres of fuel!
Started coughing and spluttering - lucky I had an extra 5 litres in a can!

A few weeks ago I suffered the same fate as Steve, Dave and James, one of the front wing brackets broke. Strange really as I believe the other guys brackets had broken soon after the cars were built mine however has lasted 3 years. Perhaps that's an indication of the difference in road quality between England and Sweden ;-) Less stress on smooth roads perhaps! It was still attached by the side bolt so I tied it up with wire, which has held well. As the MOT test is coming up I decided to do a more permanent fix.
Not sure if this is how the other's brackets broke.

While taking off the wing and bracket I noticed the steering rod balljoints need replacing and I may as well change the upper wishbone balljoints too.
Perhaps it's the extreme temperature range that deteriorates the rubber or perhaps 3 years is the normal life expectancy. 

Out at my favourite Cafe "Rosenhill" and parked next to this. 
I had to keep an eye on it just in case mine was thrown in the boot and driven off.

Hopefully I'll be reporting in three weeks that the car passed it's first MOT with flying colours but first I need to fix the battery in place, install the windscreen washer bag, bleed brakes, disconnect one of the four point safety belt harnesses (illegal to have more than three!) and probably need to bribe the inspector. Wish me luck!


Thursday, 15 May 2014

Rain stops play - again!

Actually it didn't stop it completely. Had a fantastic week with mates down in Málaga, people there don't waste time talking about the weather! The little car would have been brilliant but 3,800 km is a little too far to drive - one way! The new doors arrived which are made of thicker sheet metal, 4 mm instead of 2. Apart from that they are exactly the same. I'll get the hinge holes drilled and doors attached over the weekend, well maybe, the weather is forecast to be sunny and warm so ....

I had problems with the ignition key spinning in the lock three or four times over the last year so decided to change it before it went completely. BMW will provide a new barrel prepared for the key but require the chassis number. Luckily I still had the receipt I got for the donor car which had it written on it. Took about a week to arrive and cost about £80, not bad really. I found a few youtube vidoes that explained how to replace it. Main thing to know is it's very easy!
A bent hair clip is basically all that's needed.

I practised on the new barrel until eventually it worked quite well so went on to the real thing! Inserted the key and turned it to the first radio position about 90 degrees. Inserted the clip in the small hole:
When the key is inserted the clip goes in about half way down the plastic part of the key. After a few goes of slowly turning the clip and pulling on the key the barrel released and came out.
But it was still attached by the key chip receiver & cable. It was just to gently insert a small screwdriver in to the small retaining tabs and push on the barrel until it slipped out. 
Inserting the new barrel is just the reverse but the clip is not needed. However it has to be in the correct position to slide in and the chip receiver housing facing down.

In the end the barrel slipped into position and pow, worked fine. Well pleased with a quick but important job. 

Also tried lowering the tyre pressures a little to 1,9 bar to see if road holding is better. The new rear Yokohama tyres came with 2,5. Does anyone have any recommendations?

Sunshine tomorrow so I'll drive it to work and as it's Friday I'll take a slow drive home via my favourite Café!

if I don't see you before have a great summer and happy driving!

Tuesday, 29 April 2014

Few small setbacks

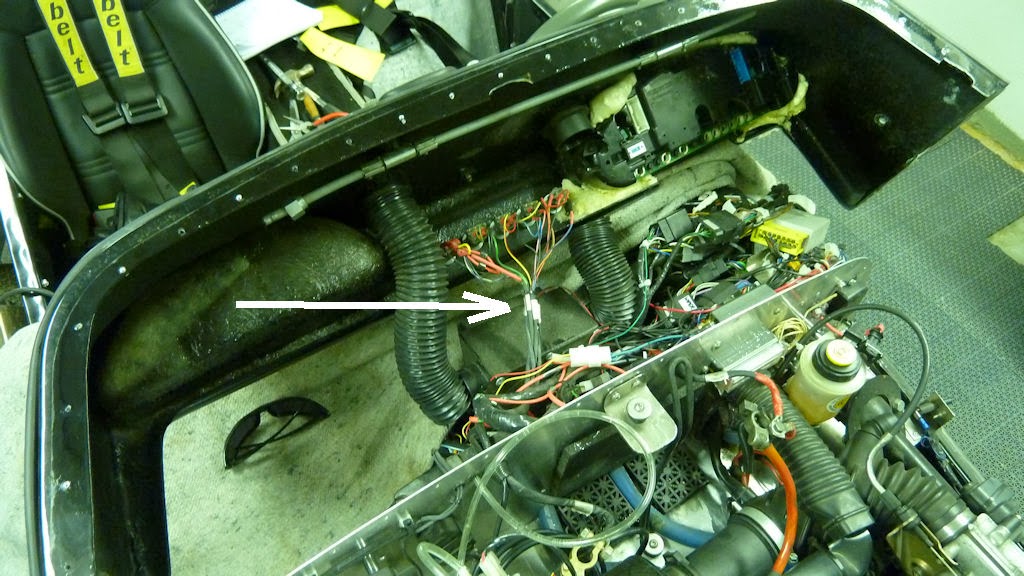
Hello again, weather has continued to be great so I've taken every opportunity to be out driving. The Scania Road trip was last Thursday so had the car ready and cleaned Wednesday evening. Thursday morning got in and tried to start and ignition was dead again. No problem just lightly thump the steering wheel as usual. That's when the steering column fell out of the retaining bracket! 
Impossible to drive anywhere!
Back to square 372, spaghetti everywhere!
It's always worth attaching the scuttle to the bulkhead with Cleco fasteners and run the car for a week or so to see that everything is functioning correctly before riveting it in place.
There is nothing to stop the bolts from slipping out of the "U" shaped bracket. While the column was hanging down I replaced the ignition switch.
Just two retaining grub screws and out it popped.
Plug out the old cable and plug in the new.
New from BMW cost around £65

once the new switch was in place I tightened both bolts holding the column in place as well as replaced the plastic/metal washers with normal metal ones. Hopefully it won't slip out again. 

I took the opportunity to also change the crank shaft sensor and throttle position sensor as I still get a slight lag occasionally when accelerating. At least with all the sensors changed I can discount them as the problem! 
Crank shaft sensor


So far, touch wood with the new ignition switch I've had no problems with a dead dashboard. Next thing is get under the car and have a good check, nuts, bolts, cables etc. Brakes need a check too, bleeding and replacing if necessary. Weather doesn't look so good over the long weekend so I'll have time to have a good check.

Talk soon, have a nice day! 

Tuesday, 22 April 2014

Battery Solved

Some good news, the weather over the Easter weekend was fantastic, and it’s still going!! I also decided against the Varley or Odyssey batteries because of always wondering whether the car would start or not. Anette has a small Peugeot 206 and the size of that battery is quite small, less powerful than the original 318 battery but better than the Varley 25, so bought one of those instead (half the price). It meant I had to remove the washer bottle so the battery could be moved over to give enough space to squeeze the air filter in.

That wasn’t an easy task because the MAF and rubber ducting between the MAF and intake take up a lot of space. The MAF can't be modified so it left only the ducting. I was a bit reluctant at first but cut off about 3 or 4cm on the MAF side and sanded down the ribbing so the clamp would go back on.
I'll add a washer bag to the side panel just in front of the lower left corner of the battery. 
Fredrik on his first driving lesson, I know what you're thinking "He trusts him driving his pride and joy?"

I’m really pleased with the solution but of course it’s not good when it comes to air getting to the engine. As a long term solution I’ll add the scoop and make a hole directly above the air filter. For the moment though it works fine.

Another problem is the ignition is not working sometimes. Dashboard is completely dead and it needs a tap on the steering wheel to get it working. I intend to take out the ignition switch and replace if need be. I hope that's all it is.

Trouble is weather is fantastic and I hate to have the car garaged on beautiful sunny days!  

Wednesday, 16 April 2014

Battery hicups

Hello again, After getting nearly all the winter jobs finished I thought I was ready to get out and enjoy the fine weather. I suddenly started getting flat battery problems. Maybe you remember when the Super Charger was installed the intake manifold, MAF etc. ended up facing backwards instead of forwards. That meant there was far less space for the battery so I had to swap the standard with a Varley Red Top 25. Problem is the Red Top is designed specifically for racing - starting the engine and not running auxiliary equipment like alarms, dashboard dials etc. I've been using a battery charger from the 90's which is probably why the red top no longer holds any charge. It maybe solved by having a trickle charger plugged in whenever the car is standing still in the garage but I don't want to take the chance and ruin another battery - they cost almost double a normal battery (here in Sweden at least!). Also the solution to draw air into the intake isn't good either, so something drastic has to be done.
Red Top in place with air filter and washer bottle. I can move  the washer bottle almost anywhere but air filter is a real problem. At the moment a pipe from the air filter goes down past the engine and points forward sucking in air very close to the road.
I've therefore made up my mind to add a scoop to the bonnet and have the filter directly under it.  This solves the problem of air as well as hopefully freeing up enough space for the battery otherwise I could move the battery to behind the radiator (if there is enough space).
It's going to look a bit mean but solves the problems. 

Bye for now.


Monday, 7 April 2014

Indicators solved

I'm happy I wired in a connector to the dashboard/scuttle switches as the dashboard had to come off again! The non-functioning indicator turned out to be me accidentally swapping two wires in the connector. I still can't get the hazard switch LED to come on at the same time as the indicators though.

Another thing that put me off taking the scuttle off was the windscreen wiper motor had to be unbolted and removed from the bulkhead leaving the wiper blade drive shaft bolted in place to the scuttle. A real ass to get the motor bolted back in place again and the drive shaft put back.

Like this but the motor had to be completely removed from the shaft otherwise the weight would damage it.

It then dawned on me that I could leave the whole thing in place only having to remove the nuts holding the windscreen splines in place and then dropping them through the scuttle. They lay on the wiring harness until the scuttle goes back!

Will change the oil in the next couple of days. May need to remove the super charger as it's a bit of a tight fit to get to the filter.

With a bit of luck it may be enough to remove the rising rate fuel regulator.

Order two tyres for the rear today. Yokohama RD08's recommended by Dave are quite expensive here and the Toyo R888's that James mentioned are hard to come by. Talked to a guy at Yokohama and he suggested the Advan Sport V105.  A great tyre with good road holding in dry and wet for road and occasional track days. I will order two more for the front once I see the results.

Bye for now!


Monday, 31 March 2014

Spring, a bit squeaky but now it's sprung!

Hello again! I hope your spring has been as good as ours albeit a little confusing.The list of to-do jobs has gradually been whittled away. Looking at the car it doesn't actually look as though I've done anything, good that I write it down in a blog to remind myself :-)
Add plug to dashboard switches - It was always a problem to remove and replace the scuttle because the cables to the switches are too short, also the switches are fed from the front so it's difficult to plug the connectors back on.
Didn't find a connector big enough so had to use two instead.

Paint dashboard - I used polyester sealant to seal the windscreen to the scuttle, totally the wrong thing to use so it had to be scraped off and in the process it was better to repaint the scuttle. I'm going to use silicon sealant instead.
Looks great newly painted - thanks Mats

Move ECU - It was difficult to get to but the wiper motor was in the way of where I wanted  it to go. I thought of a few options but in  the end will have it in the same place but hold it with one bolt only, more easily accessible.

Add wheel spacers - not  sure if these are really necessary but 15mm spacers give it a slightly wider wheelbase and brings the centre of gravity down, looks cool too.

Changed belt tensioner - this was done at the end of last year  but still counts on my to-do list.

Redo console - Had a few more dials to add and removed the heater control (It's now always on). I'm pretty happy with the results.

Add gauges - Air Fuel Ration, Fuel pressure, Rev counter with shift light and analogue clock. I have kept the reverse sensor, brake fluid lamp, switch to turn on ODB-II wifi adapter and switch to turn on curtesy light.
Shift light attached to the left of  the wheel, couldn't find a better place for it.
The extra lambda sensor was added late last year.

Add wind deflectors - I bought a set of Caterham wind deflectors, Caterham uses the same window brackets so the deflectors fit directly onto the hinges for the doors. They look really great and do actually deflect a lot of the wind.  

New seat - Unfortunately the old driver seat had come away from around the seatbelt holes. It would have been too expensive to send back to the supplier so picked a new one up while over in the UK.

Add spare wheel bracket - I bought one from Caterham which was very expensive and also didn't come with instructions, I wrote to them and  they said "We'll send you a photo when we get a customer car in that has one" How difficult is it to include a sheet of instructions or scribble down something for me; Not very professional when charging such a high price. 

Add fasteners to boot cover - This was actually Pauls idea. The idea is to have two velcro straps that go around the roll bar and back on themselves to keep the front of the cover tight in place. I sent off for 50mm wide velcro strip and Anette machined it on for me. It looks great and adds a nice touch - thanks Anette.

New doors - Peter is making up two new doors which are made of thicker metal. Hopefully they will be more sturdy and hopefully he will send them too me soon as the season is now here!

Lower headlight bracket - Peter mentioned that his new headlamp brackets were approx 2,5 cm lower which made the headlights look less bug-eyed. Got it cut and re-welded and even though it's only a few centimetres lower it looks much better.

Not so easy to see perhaps but the lights are higher in this image

Remove rust - Yes it happens even to kit cars. There wasn't very much but I wanted to deal with it before it went too far. Mainly front steering arms and driver floor under seat.

The car is back together now, just the windscreen wipers to put on and the scuttle to rivet in place. Also the soft top brackets needs improving. I have an electrical problem which means the hazzards work but the indicators don't. I hope I don't have to remove the scuttle again!

Anette and I went out for a nice test drive on Saturday. She runs really well (I mean the car!), so well in fact that I will have to buy better tyres for it. Foot down in second and it loses traction very easily. Will have to let the bank account settle down a bit before then though.

If anyone's interested I'm selling my Dragstar 1100. It's had a back seat ever since I finished the Legend, so to be fair I need to let it go - for a good price. 2002 model with 30,000km


Have a great spring!

Sunday, 16 February 2014

Start of the winter jobs!

Sorry it's been a while since my last update. After buying a nice set of studded winter tyres there hasn't been any snow! It's almost spring like outside. As it was so mild I decided to start the winter jobs otherwise there would be a risk of not getting things finished. Decided to redo the console as I now have an AFR gauge, clock and fuel pressure gauge to add. To save a space I'll remove the heater control and have it constantly on (it never gets too hot!). 
The old and the new design.
I started off with stainless steel for the old console, but very difficult to cut and bend. Aluminium is much easier. 
Everything cut out ready for a sheet of 4mm foam. I used about 8mm for the last one and it didn't look so good where it was pinched around the screw holes.
A tin of spray photo glue worked well to keep the foam to the aluminium. On the top of that some black fake leather.
  The gauges sit quite tightly in their respective holes so no brackets needed behind.
Just waiting now for the clock and rev counter to come from Prosportgauges. The overall shape of the console hasn't changed so I can re-use the side panels.

Needed to remove the windscreen and scuttle to start moving the ECU. 
Difficult to get to when the scuttle's in place. Need to find a solution that doesn't interfere with the windscreen wiper motor.

It's also a bugger to take the scuttle off because of all the connectors to the five dashboard switches so I'm adding a long cable and a single connector to disconnect them all in one go.


A little bit of rust around the front track rods and also under the drivers seat. Pained stripper on, remove the bad paint and will re-spray. 
I don't think the bolt holes for the seat was sealed well enough so water crept in.

To do list:
  • I bought a Caterham spare wheel bracket kit (too expensive!), no instructions included but hopefully I can mount it without having to move the number plate or light.
  • Battery trickle charger socket. Nice to plug the car in when it's not being used for long periods without taking the bonnet off.

Sometimes it's a little difficult to find the time or motivation but I try and do something on the car every day, whether it's just a five minutes job or a few hours. Just to keep me going  in the right direction. Spring is only round the corner!

Hopefully see you in a little while!

Friday, 3 January 2014

A very dull winter

Hi again! Happy New Year! 

We've had just one day of snow so far this winter and that was December 6th! By the time I drove down to Rodenhill it had all but melted.
Without the top and doors on it gets a bit cold. Anette bought me gloves, flying goggles and fur flying hat for Christmas so I'm well prepared for when it does actually snow for real.

Last January I sent a mail to Adam Wilkins at "Complete Kit Car" asking if he would add me to the readers' cars. Well he very kindly did; in the June issue but I missed it and only realised a couple of weeks ago and so ordered the back issue. 
This was in the Stoneleigh article.

and this in the Readers' Cars ...

Thanks for that Adam.

I've been putting off getting the car up on blocks and starting the winter jobs. Main reason is I've been waiting for a sunny day but it's only doom and gloom at the moment. 

This is now, at 3pm on Friday 3rd of January! The camera does it justice, it's actually worse than this. My normal car is off the road with starter problems so I bought the little car (circled - with soft top on). It's about 6oC so dry and comfy while driving!


I'm spending some time making the garage look more presentable. Redone a lot of the old shelving as well as in the process of covering the floor. I thought about repainting the concrete but decided to lay plastic floor tiles. It allows the floor to breath and stays nicer looking. I found an old drain that the previous owner had cemented up for some reason so opened it up again. I'll run pipes for hot and cold water so the car can get a nice warm wash instead of me spending money at the car wash.

I've changed to just dark grey tiles - black were showing the dirt.

If the weather continues I'll get started on the car. Hopefully it'll be finished sometime in March so there will be snow and sunny days.

Enjoy the new year. See you soon!