Steve's GKD Legend

Steve's GKD Legend
Still, On the road again!

Search This Blog

Sunday 25 September 2016

The rebuild begins!

I have all the parts except the last piston so decided to start getting things back together again. Started with getting the crankshaft installed. As the bearings are going to be replaced I don't need to worry about the positions of the new ones. 
Guide bearing in position
All upper bearing shells in place, cleaned and a layer of assembly lube added.
Very carefully lowered the crank into the shells and made sure it could move freely. I put a length of Plastigauge on each of the main journals, added the new bearings and caps and tightened the old bolts to the correct torque. 
All were within spec. which is lucky as I doubt whether I could have taken them back otherwise.
I then cleaned off the Plastigauge and put everything back and tightened up the new cap bolts again to the correct torque and angle (50degrees) 
All the main cap bolts in place and torqued.
Put back the rear oil seal cover replacing the gasket and oil seal. Much easier to install using the plastic installation tool.
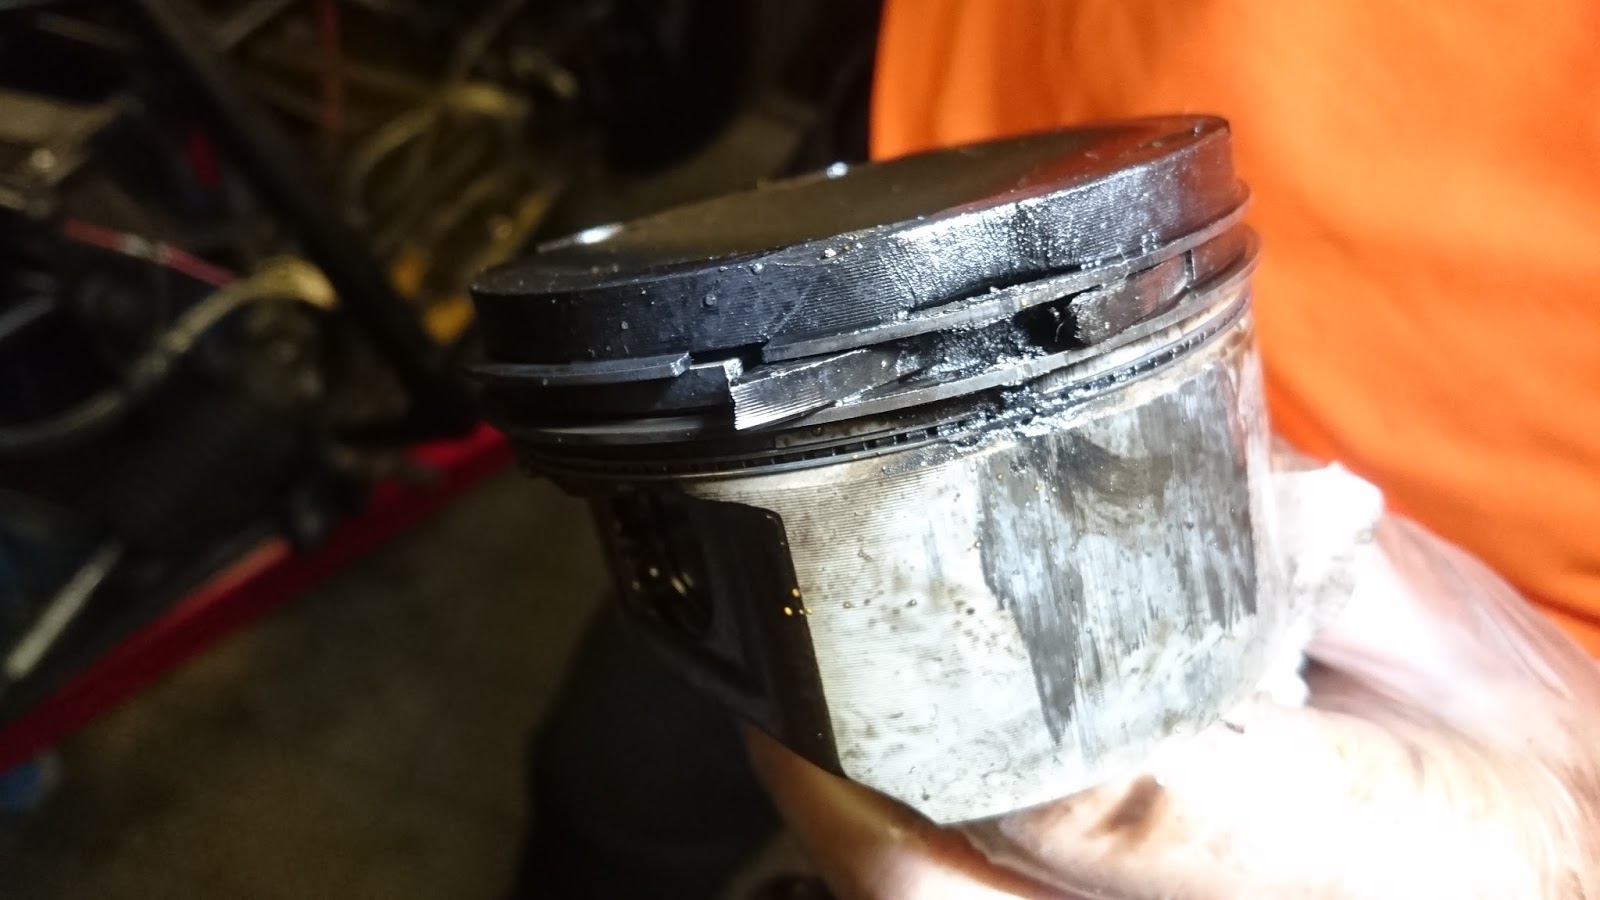
Put back pistons 1, 3 and 4 making sure the rings where correctly aligned at approx. 120 degrees. The ring compressor I bought from Biltema actually worked! I used assembly lube for the big-end bearings. I reused the ARP big end bolts, it says on ARP's homepage that they can be reused.
Replaced the rear cover plate as I bent the old one.
It wasn't easy to get the flywheel back on and bolted to 120Nm without the engine being in the car. On my own too which didn't help either. Adding the clutch assembly wasn't so bad but could have done with a third hand when centering the clutch plate.
The engine stand is excellent. The extensions I added gives good space for flywheel and clutch.
Front cam chain housing in place with new gasket in between.
Changed oil filter gasket, bush, filter etc.
Oil filter housing bolted back in place.

Hopefully tomorrow the last piston will have arrived so the head, sump, timing chain etc. can be put back on. It's getting to the point where I see light at the end of the tunnel. I'll double check that I haven't forgotten anything.


Sunday 18 September 2016

Another piston broke

I picked up all the parts from BMW yesterday but have to wait for the guide bearing shells. In the meantime started checking the ring clearance in the cylinders. Managed to replace three sets of rings. 
Cylinders 1, 3 & 4 were within spec. 

Then removed the rings from No 2. As soon as I started to remove them two large bits of piston between the ring guides fell out!
So the  rings being lined up wasn't the cause of the low compression it was the broken piston!

I've read that burned pistons are caused by a number of things:

1) Dirty or faulty fuel injector that are running way too lean.
  • The injectors were tested and 2 & 3 were shown to be low compared with 1  & 4
2) Wrong heat range spark plug (too hot for the application)
  • Not relevant in my case
3) Over-advanced ignition timing 
  • Not relevant
4) Possibly a bad knock sensor that failed to detect detonation
  • Not sure will have to check
5) On engines that are turbocharged or supercharged, too much boost pressure and/or not enough fuel can burn a piston very quickly.
  • I don't think this relevant as only two pistons have been effected.


Tuesday 13 September 2016

Ready to start rebuild

Hi again,
I collected the head and block today from a nice company close by called Broms och Toppservice (Brakes &  head). The valves were pressure tested and passed and the block was honed. Both head and block were then planed and cleaned and look great!
Looks new - almost


Have to put back the oil spray nozzles.
The nozzle and bolt have holes in them for the oil to be sprayed onto the underside of the cylinders, I need to double check whether I need to get the holes lined up but I don't think so as there is a space between so the oil can circulate and besides it would be a pretty bad design if it had to be!
Checking bearing shells for part numbers

I ordered all the parts from the local BMW dealer. I decided when it comes to engine components to go for original parts. It all came to a hefty amount so I'm hoping I can get it all back together without screwing up.


Friday 9 September 2016

Delving deeper

Going where this man has not gone before! I'm having the valves pressure tested and will also get the cylinders honed as there is slight scoring. To do the cylinders I will take the crankshaft out, It means I'll have to remove everything. 
Took the clutch and flywheel off.
and then the end seal mounting. 
Front timing assembly removed and oil filter
Crankshaft yokes and bearings market up
Have to make sure I can put things back together again!

Carefully removed each yoke and bearing in turn.
Laid out in order
Everything removed from the block
Ready for honing - back hopefully next week


Sunday 4 September 2016

Piston broken

After getting some great help to get the engine out we continued and removed pistons 2 and 3, the ones showing sign of low compression.
Umm been here before - third time lucky perhaps!
Removing one of the remaining timing chain guides so the chain could be removed. It's tied to the cam sprockets so hopefully the timing won't be too difficult to set correctly later.
I will remove the mount, alternator etc. as I may need to take the block somewhere to get it honed (I'm not sure that I trust myself to do it so the cross hatching is at the right angle). 
Well not a pretty sight. This is piston 3, the one showing signs of wear. The rings are still whole and in place but the piston is broken between the ring grooves. Two bits were ready to fall out completely! The side of the piston is also worn so what's happened? 
The wall of the cylinder is slightly scored but maybe it's enough to use a honing tool?

Now this is interesting, below is piston 2, also showing signs of low compression. Took the piston out, no damage to the actual piston but straight away noticed that the ring gaps were lined up and not at the usual 120 degrees offset alignment. From what I have read it is usual that rings rotate over time so perhaps it's coincidence that they are aligned just now! But this can't be good for compression can it? I'll replace them with new ones and put them back to 120 degrees.
Is it the cross hatching in the cylinder that makes the rings rotate?

I'd like to get the head and valves looked at too just in case there's something that needs doing. Hopefully I'll be able to start putting bits back soon!

Here is another close up of the broken piston. Only the rings were keeping the bits together. Is this the sign of over heating due to running too lean? This injector was showing signs of low fuel throughput.