Steve's GKD Legend

Steve's GKD Legend
Still, On the road again!

Search This Blog

Sunday 25 March 2012

On the road by Easter? Place your bets!

Well, I didn't receive any phone call to tell me the panels were ready but I don't mind as I still have internal jobs to do that are much easier with the panels off,  like seats.

I had another go at making a bracket for resting the clutch foot. I bought a pedal set on one of my trips but because the pedals are so close together I couldn't use it. Instead I cut one of the pedal covers in half and bolted it to a bracket which I can slide up and down the frame rail for fine adjustment. 
On a long trip I used to get cramp in my foot as there was nowhere to rest it.

Another job was getting the LED lights sanded down, filled and sanded again. I had to get at least one done as tomorrow I'm handing over all the fiberglass parts to a chap at work who has a paintshop. I was using a wing as a sanding block to get the light to the right shape.
Cut down lamp casing, one more to go! I'll put a circle of rubber between the lamp and the wing. 
All the fiber bits ready for filling, sanding, painting and varnishing. I can't wait to get them back!

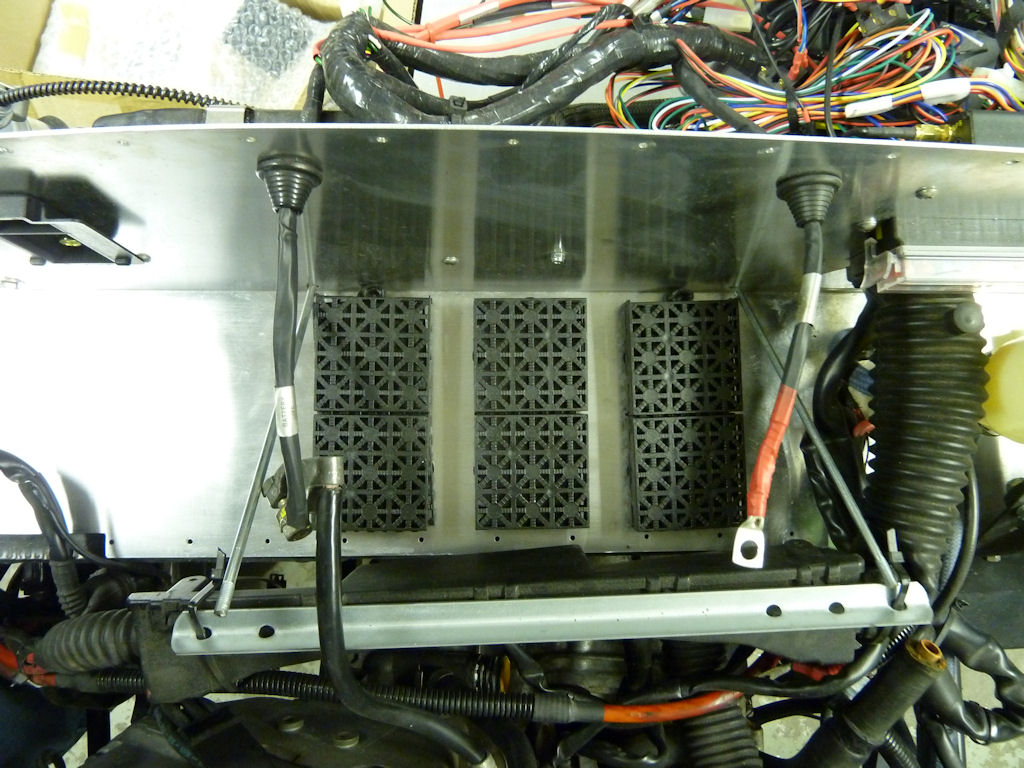
Drilled holes for the water heater pipes and connected them to the engine side. The battery fitted nicely over the top.

I hope the heater actually works after all this. The main problem is going to be demisting the windscreen.

Sunday 18 March 2012

Sickness slows things down

Unfortunately picked up a cold last week which finally took its toll Friday afternoon. Even with a few pints of Jims homebrew to celebrate Saint Patricks day didn't get rid of it. Therefore the enthusiasm has been a bit low but still managed to fix a few things. I picked up the painted test piece from Danbo and  it looks really great. If the rest of the panels look like this I'll be extremely happy.
Hopefully all the panels will be ready by Friday

The longer brake pipes were also ready to pick up and £20 for both was a great price, plastic coated too! I put them in place along with the springs to limit the turning circle, plastic sleaving etc. Only the toe has to be adjusted now but that'll wait until I rivet the side panels on as I can't put the panels on while the shocks are in place and that may throw the steering out.
I went with the cut springs instead of the other alternatives even has the natural spring damping on full lock.
I'll put the disks and brakes back on later.

I tried a couple of solutions for the LED lights that will go on the rear wings (lights, stop lights and indicators) but they didn't look good at all. In the end I cut into the original lamp housing to reduce its thickness. 
I may reduce it even further but have to strengthen it.
Before cutting I used plastic padding to stick the screw tubes to the casing. Then put in a layer of plastic padding in the base. Later I'll shape the rear so it matches the rounded shape of wing.

Sunday 11 March 2012

A bit of body and glass

Spring feels just around the corner so there's pressure to get the essentials finished at least before April arrives. I picked up the windscreen glass a week ago as well as the panels so I had a few things to keep me busy. I got the welding guy to cover up the holes from the old rear lights and then I marked and cut out the holes for the round LED fog and reverse lights. The lights are only 22mm deep with only about 10mm protruding out from the panel. Hopefully it will look okay as it's too late to go back now! 
The lights shouldn't effect the rear sensors. 

I asked to have the side panels welded to the rear, it looks okay, better than not welding and hopefully will look better when powder coated!
  
It was quick difficult to get hold of 5mm laminated glass so I ordered two to be on the safe side. They cost around £45 each so less than my insurance excess would be.
The edges were a little long for the side screws to go in so I took away a few millemeters with  the Dremmel.
Before the glass went in I drilled 3.2mm holes for the press studs for the soft top. Then put them in using short rivets, which means the glass can go in without hitting them.
Press studs in place as well as glass. Ready to go back on once the scuttle has been filled, sanded and painted.

I wanted the heating pipes to go directly from the engine in/outlets under the battery, through the aluminium bulkhead and into the heater. Thought about making an alumium box to lift it but the had the idea of simply using one of those plastic floor tiles which are about 6mm thick to lift the battery up slightly. It's possible to cut them quit easily and stacking two should give enough space to get the water pipes under.  
The battery clamps should keep everything together nicely

Another small job but still very important is to find a way of attaching a clutch foot rest. I bought a readymade one from CBS but there is no way there is space enough for it. At the moment I've bolted on a jubilee clip just to get the position right and then maybe weld a small plate to it. That way I can always adjust it if necessary.

It can be seen bolted round the frame. Has anyone solved this problem?