Steve's GKD Legend

Steve's GKD Legend
Still, On the road again!

Search This Blog

Sunday, 25 March 2012

On the road by Easter? Place your bets!

Well, I didn't receive any phone call to tell me the panels were ready but I don't mind as I still have internal jobs to do that are much easier with the panels off,  like seats.

I had another go at making a bracket for resting the clutch foot. I bought a pedal set on one of my trips but because the pedals are so close together I couldn't use it. Instead I cut one of the pedal covers in half and bolted it to a bracket which I can slide up and down the frame rail for fine adjustment. 
On a long trip I used to get cramp in my foot as there was nowhere to rest it.

Another job was getting the LED lights sanded down, filled and sanded again. I had to get at least one done as tomorrow I'm handing over all the fiberglass parts to a chap at work who has a paintshop. I was using a wing as a sanding block to get the light to the right shape.
Cut down lamp casing, one more to go! I'll put a circle of rubber between the lamp and the wing. 
All the fiber bits ready for filling, sanding, painting and varnishing. I can't wait to get them back!

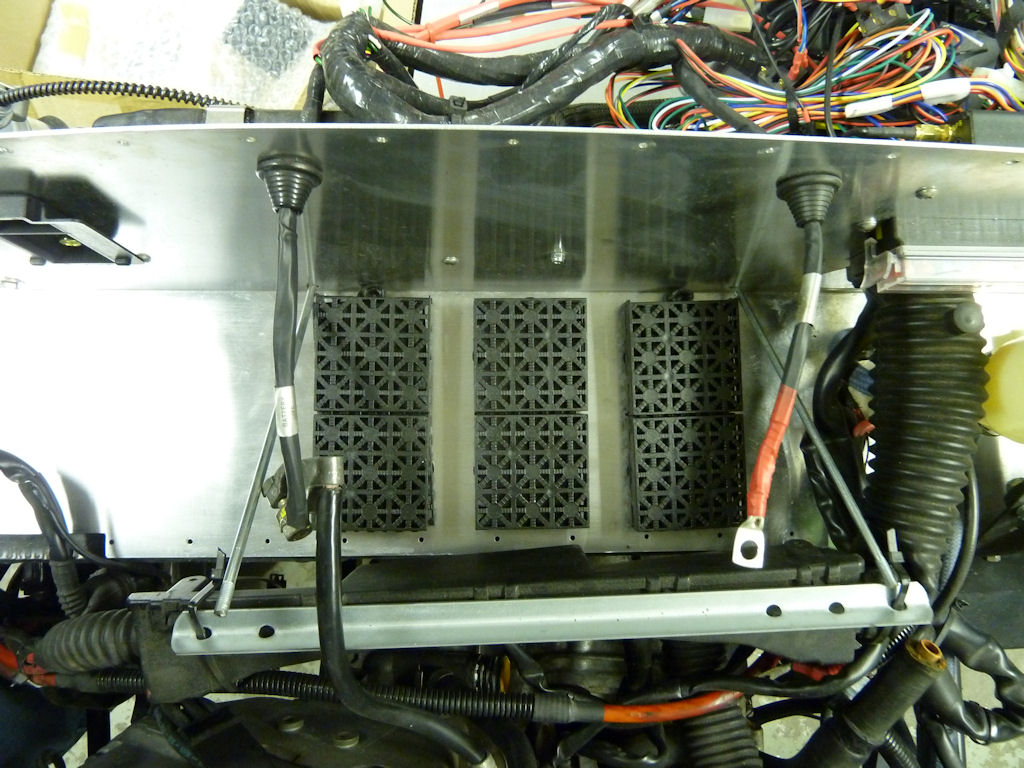
Drilled holes for the water heater pipes and connected them to the engine side. The battery fitted nicely over the top.

I hope the heater actually works after all this. The main problem is going to be demisting the windscreen.

Sunday, 18 March 2012

Sickness slows things down

Unfortunately picked up a cold last week which finally took its toll Friday afternoon. Even with a few pints of Jims homebrew to celebrate Saint Patricks day didn't get rid of it. Therefore the enthusiasm has been a bit low but still managed to fix a few things. I picked up the painted test piece from Danbo and  it looks really great. If the rest of the panels look like this I'll be extremely happy.
Hopefully all the panels will be ready by Friday

The longer brake pipes were also ready to pick up and £20 for both was a great price, plastic coated too! I put them in place along with the springs to limit the turning circle, plastic sleaving etc. Only the toe has to be adjusted now but that'll wait until I rivet the side panels on as I can't put the panels on while the shocks are in place and that may throw the steering out.
I went with the cut springs instead of the other alternatives even has the natural spring damping on full lock.
I'll put the disks and brakes back on later.

I tried a couple of solutions for the LED lights that will go on the rear wings (lights, stop lights and indicators) but they didn't look good at all. In the end I cut into the original lamp housing to reduce its thickness. 
I may reduce it even further but have to strengthen it.
Before cutting I used plastic padding to stick the screw tubes to the casing. Then put in a layer of plastic padding in the base. Later I'll shape the rear so it matches the rounded shape of wing.

Sunday, 11 March 2012

A bit of body and glass

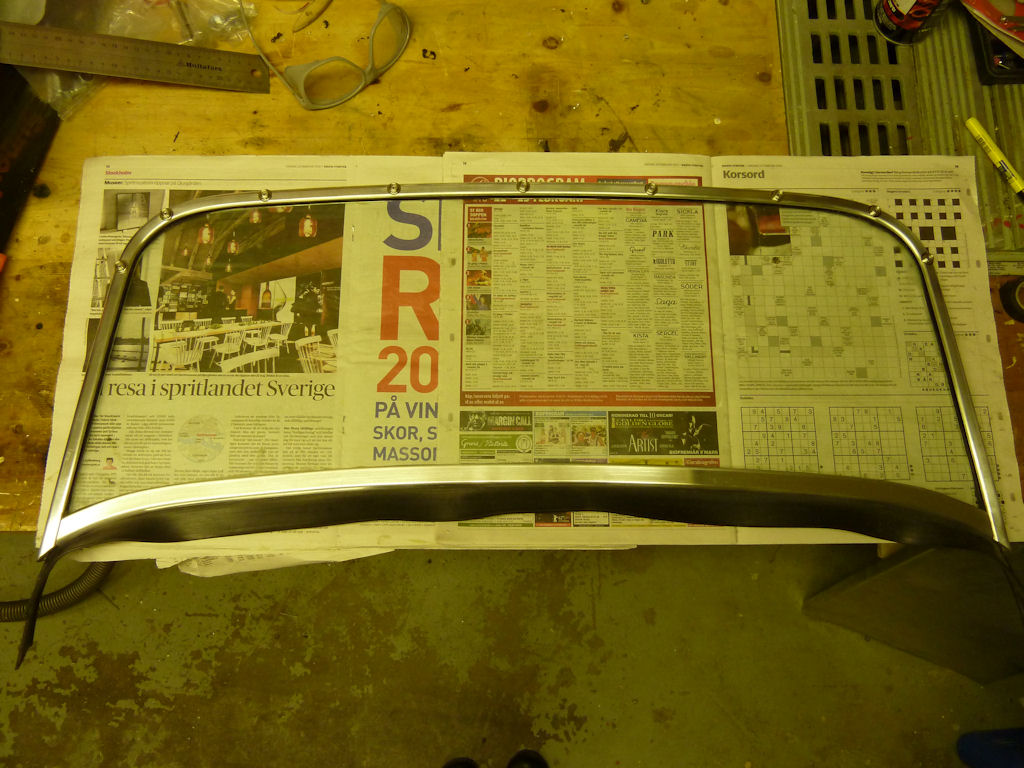
Spring feels just around the corner so there's pressure to get the essentials finished at least before April arrives. I picked up the windscreen glass a week ago as well as the panels so I had a few things to keep me busy. I got the welding guy to cover up the holes from the old rear lights and then I marked and cut out the holes for the round LED fog and reverse lights. The lights are only 22mm deep with only about 10mm protruding out from the panel. Hopefully it will look okay as it's too late to go back now! 
The lights shouldn't effect the rear sensors. 

I asked to have the side panels welded to the rear, it looks okay, better than not welding and hopefully will look better when powder coated!
  
It was quick difficult to get hold of 5mm laminated glass so I ordered two to be on the safe side. They cost around £45 each so less than my insurance excess would be.
The edges were a little long for the side screws to go in so I took away a few millemeters with  the Dremmel.
Before the glass went in I drilled 3.2mm holes for the press studs for the soft top. Then put them in using short rivets, which means the glass can go in without hitting them.
Press studs in place as well as glass. Ready to go back on once the scuttle has been filled, sanded and painted.

I wanted the heating pipes to go directly from the engine in/outlets under the battery, through the aluminium bulkhead and into the heater. Thought about making an alumium box to lift it but the had the idea of simply using one of those plastic floor tiles which are about 6mm thick to lift the battery up slightly. It's possible to cut them quit easily and stacking two should give enough space to get the water pipes under.  
The battery clamps should keep everything together nicely

Another small job but still very important is to find a way of attaching a clutch foot rest. I bought a readymade one from CBS but there is no way there is space enough for it. At the moment I've bolted on a jubilee clip just to get the position right and then maybe weld a small plate to it. That way I can always adjust it if necessary.

It can be seen bolted round the frame. Has anyone solved this problem?

Sunday, 26 February 2012

Wishbones done - again and more

It's been a good couple of days and a few things have been crossed off the to-do list. I wanted to check how good the lock to lock was on the steering after the new wishbones were installed. It's made a really big difference in fact I'll have to stop it going too far as the cycle wings will hit the body.
It was easier taking the headlights and radiator off to get to the upper spring mounts 
Upper and lower wishbones in place
To get the new upper spring mounts to fit flush with the old the edge had to be filed away and finished with a dab of "Hammerite" rust protection paint.
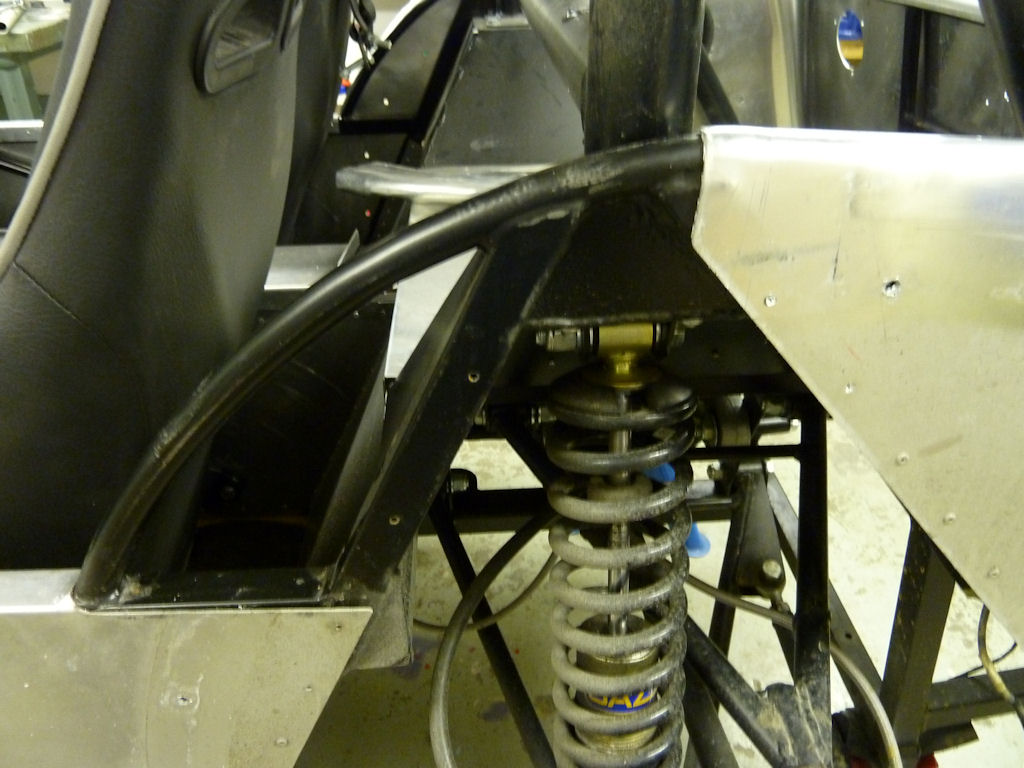
Spring mounts in place ready for the spring to fit in between.
With all the bits temporarily in place the turning circle is excellent. I won't have to do a 4 point turn to get out of the garage now!
Problem is, it's too good and the cycle wings will hit the side panels. I think I can cut the spacer/centralling springs in half to stop the wheels within about 5cm of the side panels.
The theory is I can cut these springs to 25mm (compressed) and put them back on again.

I'll set up the tracking as best I can and then get it professionally done. I'm happy that it's been quite a straightforward job and the improvement in steering will be very much worth it.

I also fixed a couple of small jobs that should have been picked up in the registration test. One was correctly fixing the ends of the hand brake cables and the other was a missing lock nut on the rear track rod.
Much safer with the bolt through it and squeezed in place.
Another job was to replace the small car trailer mud flaps. I found a large strip of 5mm hard rubber, that I cut to shape. It may be a little too big but it'll stop a lot of stones (probably even boulders!)

I'm looking forward to the coming week as the windscreen glass should be ready to pick up and hopefully the panels are also ready to pick up (they have been gone a long time!!)


Sunday, 5 February 2012

A bit of ground work done

Wednesday I gave all the panels to Stefan at IBL a specialist in aluminium welding. He's going to fill all the unwanted holes and bumps ready for me to drill new bonnet catch holes and rear light recesses and then take them over to Danbolack for powder coating.  In the mean time I did some small jobs on the scuttle including drilling holes for the wipers, washer and also window defrost vents.
Holes for the wipers blade hubs drilled at 45 degrees
One wiper hub in place, I hope it's going to be easy to connect the wiper motor cable to these once all the electrics, heater, dashboard etc. are in place. It'll be a bit of a tight fit!
A washer head that I bought separately from the kit but on a small car it looks a bit too big!
Wiper blade arm shortened by 65mm so the blade doesn't hit the top of the windscreen.
All the holes drilled and the switches and BMW dash taken out ready to sand and fill so it's ready for painting in a few weeks time.

I bolted the washer water bottle in place but will run the cables and water hose later on. I had to move the OBD diagnostics connector a bit to the left to make space.
Bought a heater from E-bay for about £150 which includes a lever to adjust temperature. It'll fit nicely here and connect to the defrost vents as well as a possible four more for vents to passenger and driver. The outlet pipe from the engine goes via the temperature adjuster into the heater and then back to the engine. I'm considering lifting the battery up 2cm so the heater pipes can go straight from the engine under the battery and into the heater. 
Console will cover up all this.

Sunday, 29 January 2012

Still going in the wrong direction!

Finally I managed to get off all the panels. As I mentioned before removing the sealant was a real pain in the r's. In the end the easiest way was to gently use a screwdriver and tap it gently with a hammer to part the panel from the frame. After that I used the sealant remover which worked quite well. 
Once all the sealant was removed I put the panels back on and tapped all the edges with a rubber mallet to get them back into position for riveting later.

All the panels removed, it feels like I'm almost back to square one but it won't be long before things start going back on again.

Now  the scuttle is off I bolted the wiper motor to the inside of the bulkhead. I can adjust how much motor is sticking through the bracket so it can't be seen by the passenger but also doesn't hit on the side of the scuttle.  

 Drilling the holes for the wiper blades and washer comes later.

Started changing the front wishbones. Didn't take long to remove everything. Tomorrow I'll try and borrow a press to push the bushes into the wishbone ends. As the wishbones are longer than the old ones the wheels will be brought out by about 40mm. I'm not sure yet what problems this may introduce but Daves blogg explains how he has done it so I'll be checking on his progress regularly!

All that's left is the steering rack. I don't want to have to spend 3000:- on a new one just because I shortened the threads by 10mm. I should be able to get longer track rod end extensions.
The old track rod end and the new. Will it be long enough?
It should be easier to find a longer extension piece than to buy a whole new steering rack!
Mind you the new extension pieces have a longer thread than the old ones. I could screw a bolt onto the thread before screwing it into the track rod, that would make it a bit longer but would it be long enough and safe enough!

Friday, 13 January 2012

Panels away

After a few modifications to the rear panel I managed to get it off in one piece. I still have some work to do when it comes to fog and reverse lights. Neil gave me an idea to flat surface them so the main part of the body will be behind the panel. I’m just looking around for thin lights that won’t hit the tank.
I had to Dremmel the edge away from the part of the panel that curved around the side rail, the part that went past half the circumference of the bar. Once the rivets under the rear panel were also removed it was just a case of slipping the panel off from the bottom and then hinging it out and up. 

Hopefully the small side panels can be smoothed out and welded to the rear panel so it ends up being one smooth part and then painted. I'm pretty sure everything will go back on afterwards.

I also started re-doing the bonnet catches as they were too loose and had no way of being adjusted. I always had to drive with a piece of wire tied around each catch just in case they came undone and I lost the bonnet!
One of the catches to be replaced. I had to drill out the rivets first and then mark and drill holes for the new ones. Not a problem at all but I was left with holes I didn't need.

I thought about using Cleco's at first but they got in the way so I temporarily riveted them again. If I can't get the old holes filled for powder coating I'll make up oval shaped stainless steel plates that should look nice against the black; the brackets would then bolt throught them.
Got a  great air riveting gun for Christmas from my son Sebastian - my boys are trained well :-) (Fredrik bought me an air angle grider!), makes it so much easier to put in rivets, It's actually fun now!
It's nice to be able to adjust the catches and even lock the bonnet.
Rivets are easy to remove but perhaps I shouldn't have used sealant on all the panels as it's a real bugger to get off! I bought  some sealant remover today so I'll give that a try over the weekend. 

I have to modify my plans a little as the panels need to be replaced before the wishbones are put back on otherwise it's impossible to rivet the front edges of the side panels properly. It's very tempting to get the panels powder coated as soon as I can but I have to be patient and get holes drilled, edges files and sanded etc.

Saturday, 31 December 2011

The light at the end of the tunnel

After a very fruitful trip to Maidstone meeting family and friends, I came back with Christmas pressies and crackers and bits for the car; soft top, new longer wishbones, a couple of LED rear lights and a few other small odd and ends. I then had to make the painful decision to get the car up on stands and start the long list of jobs instead of taking it out for “just one more drive”
Drove down to  Burgess Hill to meet James and finally see his car. (in the picture Andy not James)

First job was to start stripping. I have kind of decided to start at the rear, concentrating on preparing and removing the panels ready for painting. I’m still not actually sure whether the rear panel will come off.
Quick check of the soft top - poppers have to be rivited on.

Bought a couple of LED lamps to replace the rectangular ones. Will sort out how to fix them later.

Enoyingly enough my MC jack packed up just as I got the car on the stands. Will have to fix it if I'm ever going to get it down again!

Fuel tank removed.

It was very difficult bending the top edges of the rear panel without getting a bumpy finish so I'll need to file the rough parts and finish off with fine sandpaper.


Hopefully once the rivets are removed from around  the base of the panel it should just be a case of lifting the panel over the frame - I hope! Just for fun I found a reversing sensor kit on ebay and started drilling holes in the base of the rear panel to house the sensors. Hopefully the fog and reverse lights won't interfere.
A 22,5mm drill is included in the kit. The holes need cleaning up with a file before the powder coating.

The rear looks very bare. I’ll try and find some smaller diameter LED lights to replace the square fog and spot lights.

Not sure how to solve this (taken off) side panel as I made a real dogs ear of  it while bending. I'll chat with the powder coat chap and see what he suggests. 

See you in 2012!